GSM bug hack - get a cheap phone controlled switch
20 October 2014
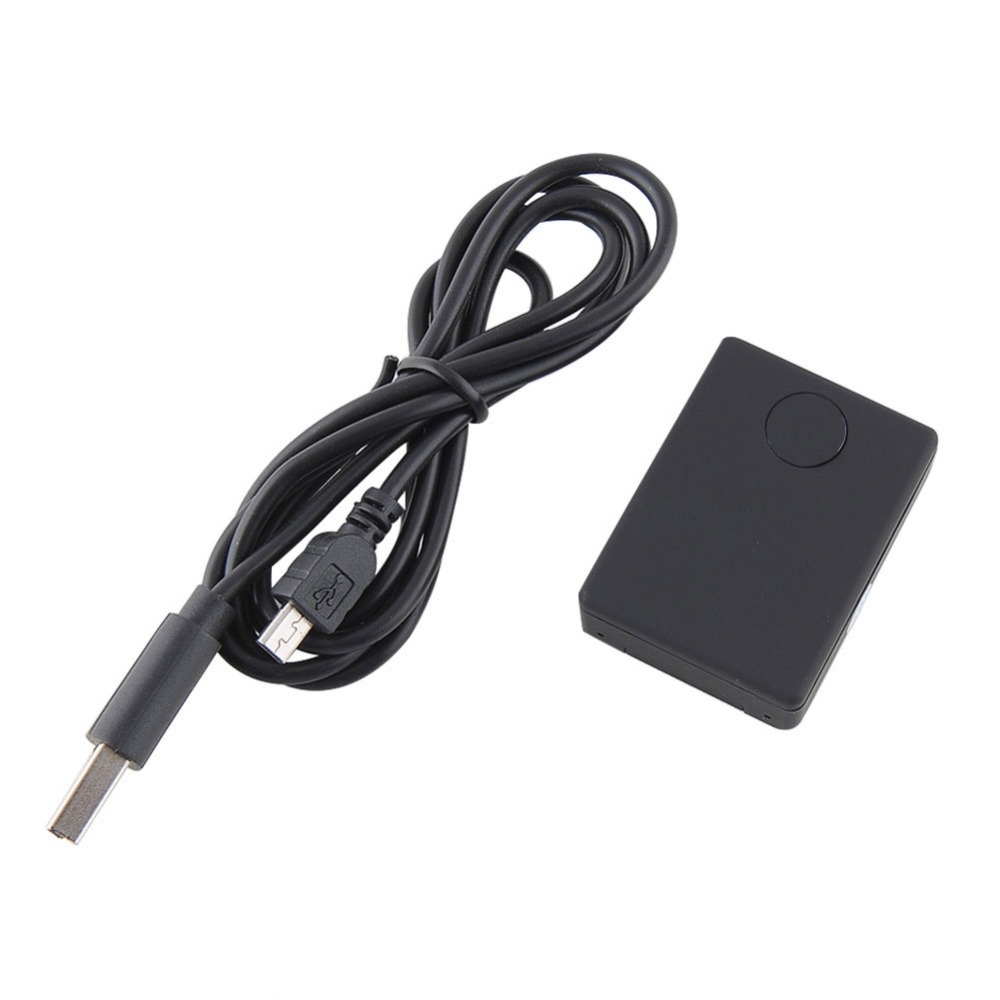
For more than a couple of years, I have been growing a great interest in the Chinese gadgets scene. It all started with some key chain spy cameras and evolved into mini PCs, tablets, smartphones and electronics. Now, I decided to revive the old times and tangle myself again with ingenious spy gadgets. For quite a while, I have been aware of GSM surveillance bugs (they come under many different names and shapes, I’ve got this one) which essentially are some tiny boxes with a SIM card socket, also equipped with a microphone. You call them, they answer automatically and you can hear whatever is in proximity. Pretty sneaky, especially when these low profile boxes are only a few centimeters big! Another interesting fact is that they are based on a Mediatek processor, namely the MT6223DA which is intended for ultra low cost phones.
What intrigued or rather inspired me to buy one of those gadgets and hack it, was the high cost of the GSM shields for the Arduino microcontroller. In some home automation projects that I have under development, I just needed a GSM module to initiate or stop a sequence of events for my microcontroller to take care of. Of course, I could use an inexpensive GSM module like this one and do things in a less unorthodox manner, but where would be the fun in that or more importantly what if I just wanted a cheap on/off switch and nothing more?
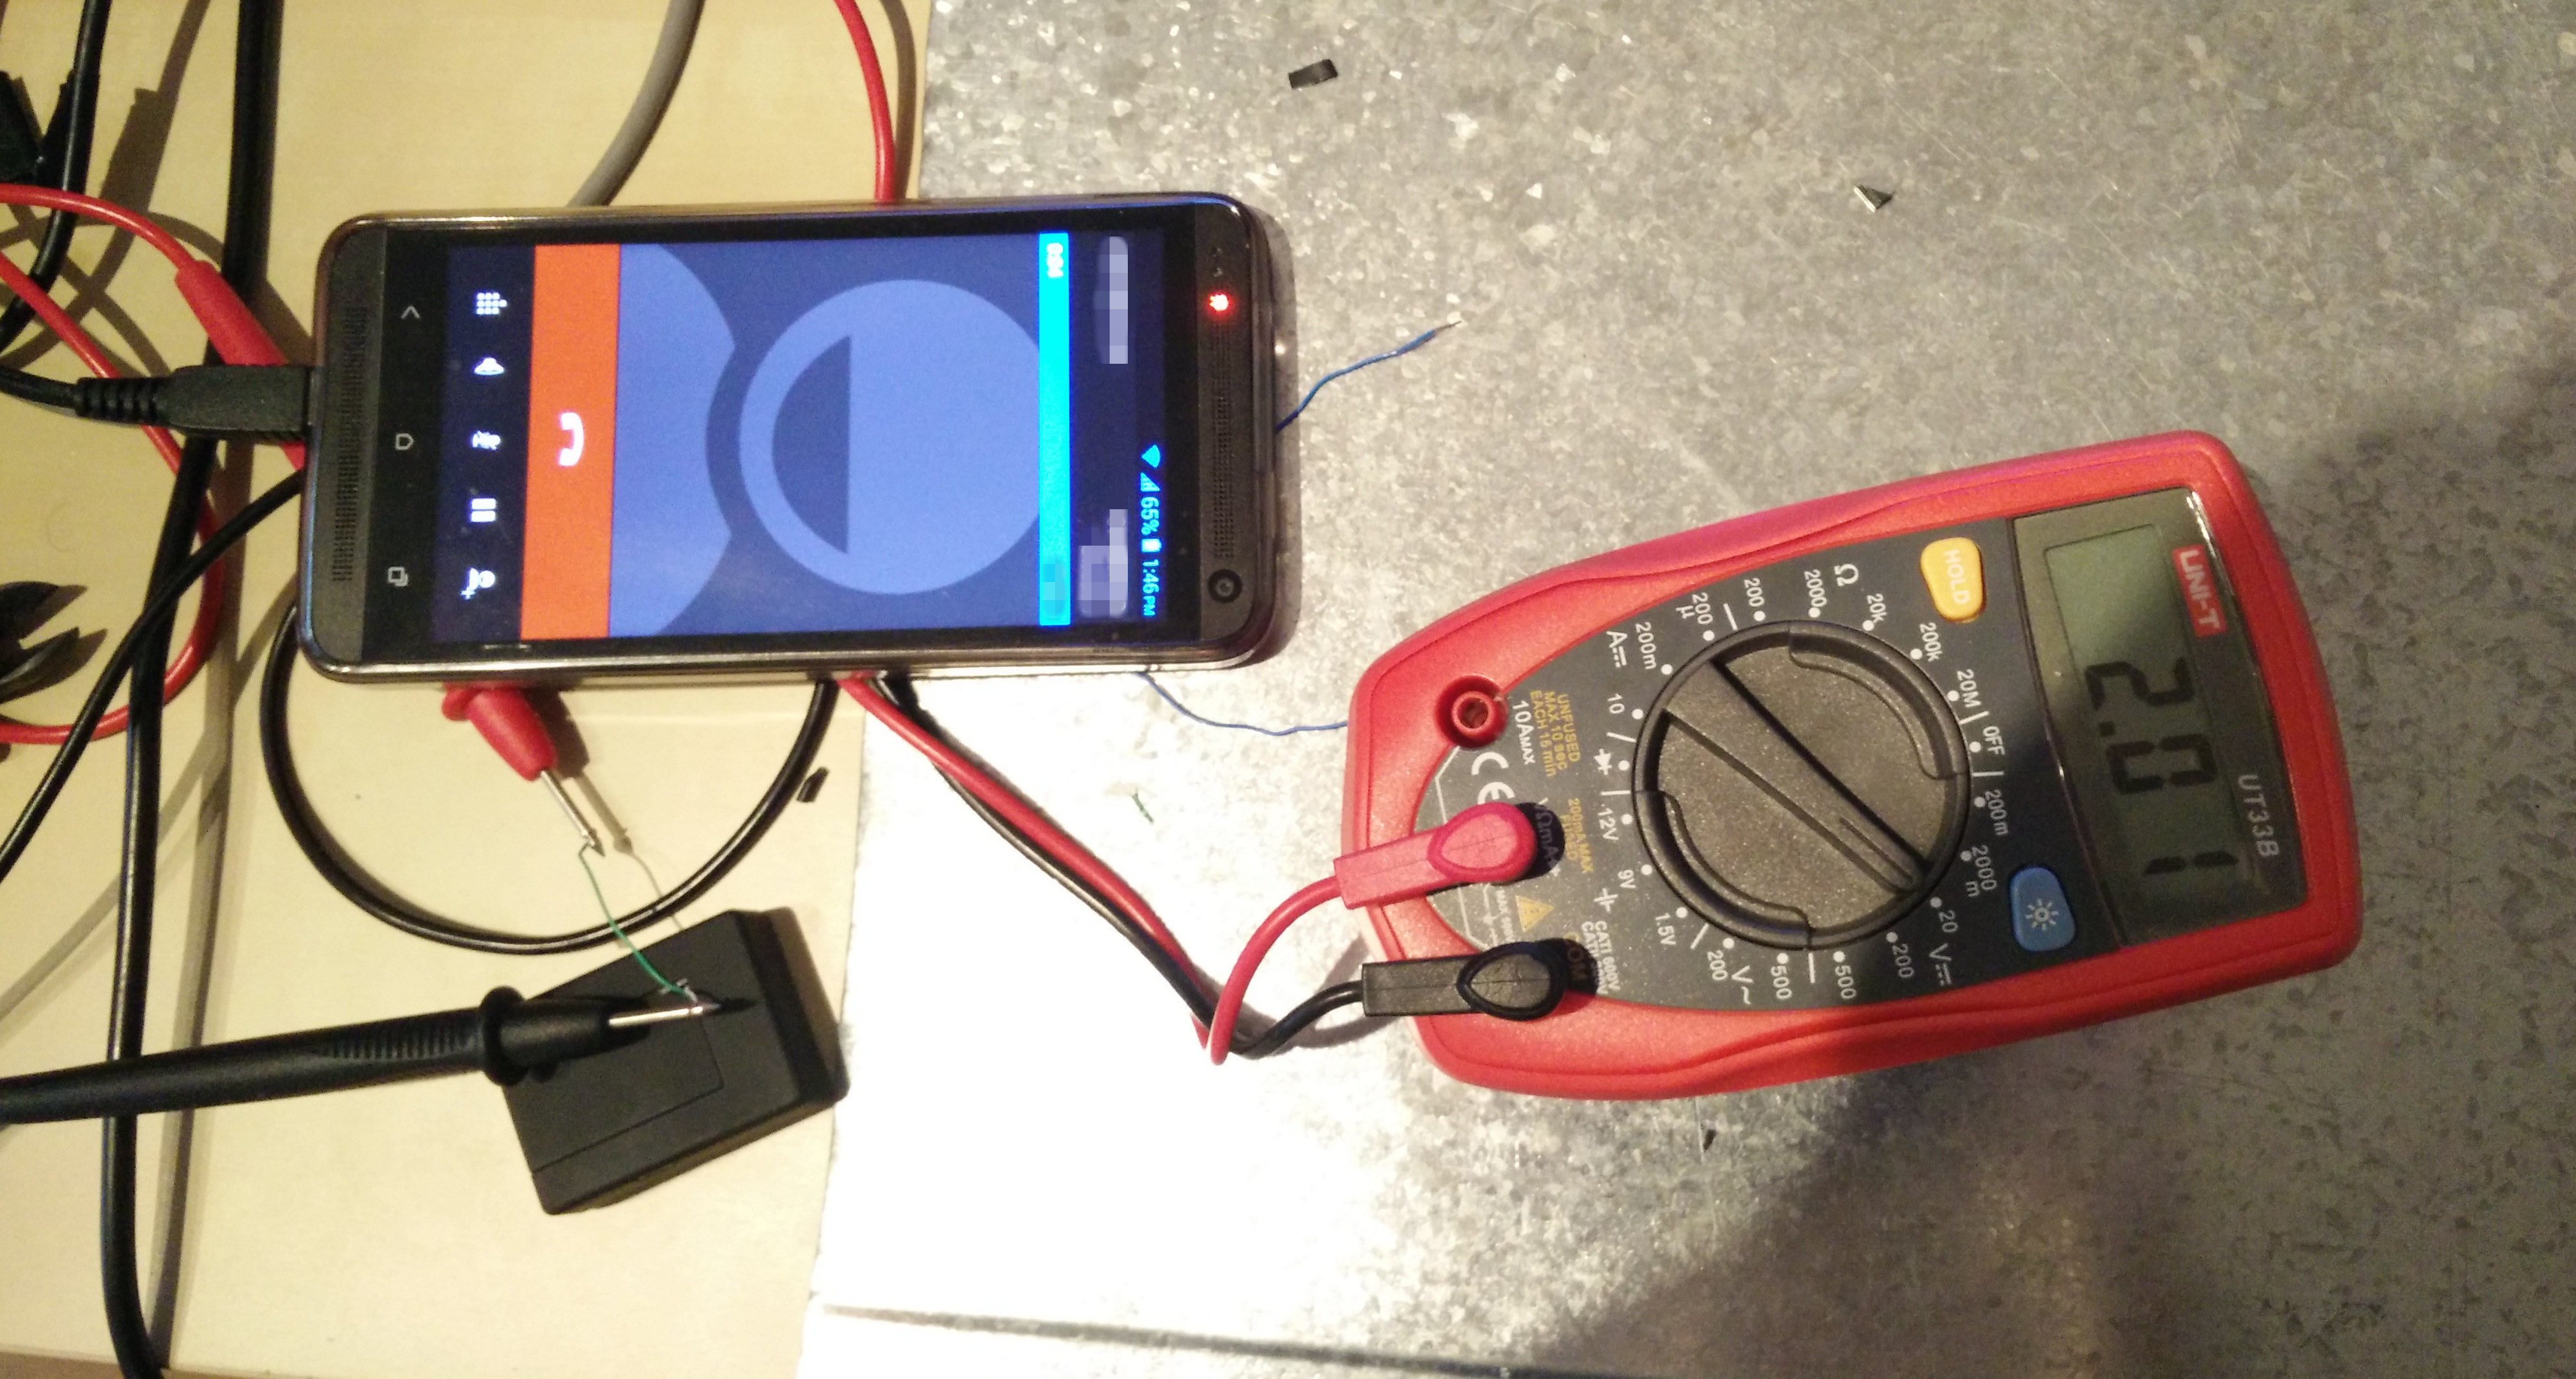
Just when I had grown impatient of waiting, I received this lilliputian gadget. First, checked to see if it was working as intended, then tore it apart… gently and engaged myself into trying to get a leverageable signal out of it. After persistently poking around with my trusted multimeter, I was lucky enough to discover what I believe to be the positive pole of a capacitor, that is charged with 2 Volts throughout the duration of a call. Well, that was basically it. After soldering some cables to the ground and the voltage source, we can exploit this into doing whatever we want with that signal. I drove it into a transistor, thus creating a simple on/off switch that should work for low currents and voltages. If larger appliances are to be controlled by it, you can introduce a relay into the circuit or send this signal straight to something more intelligent such as an Arduino or a Raspberry Pi.
Details on how to build this yourself and possible use cases follow. Note: You can also find this tutorial at instructables.
Total cost: ~10 euros
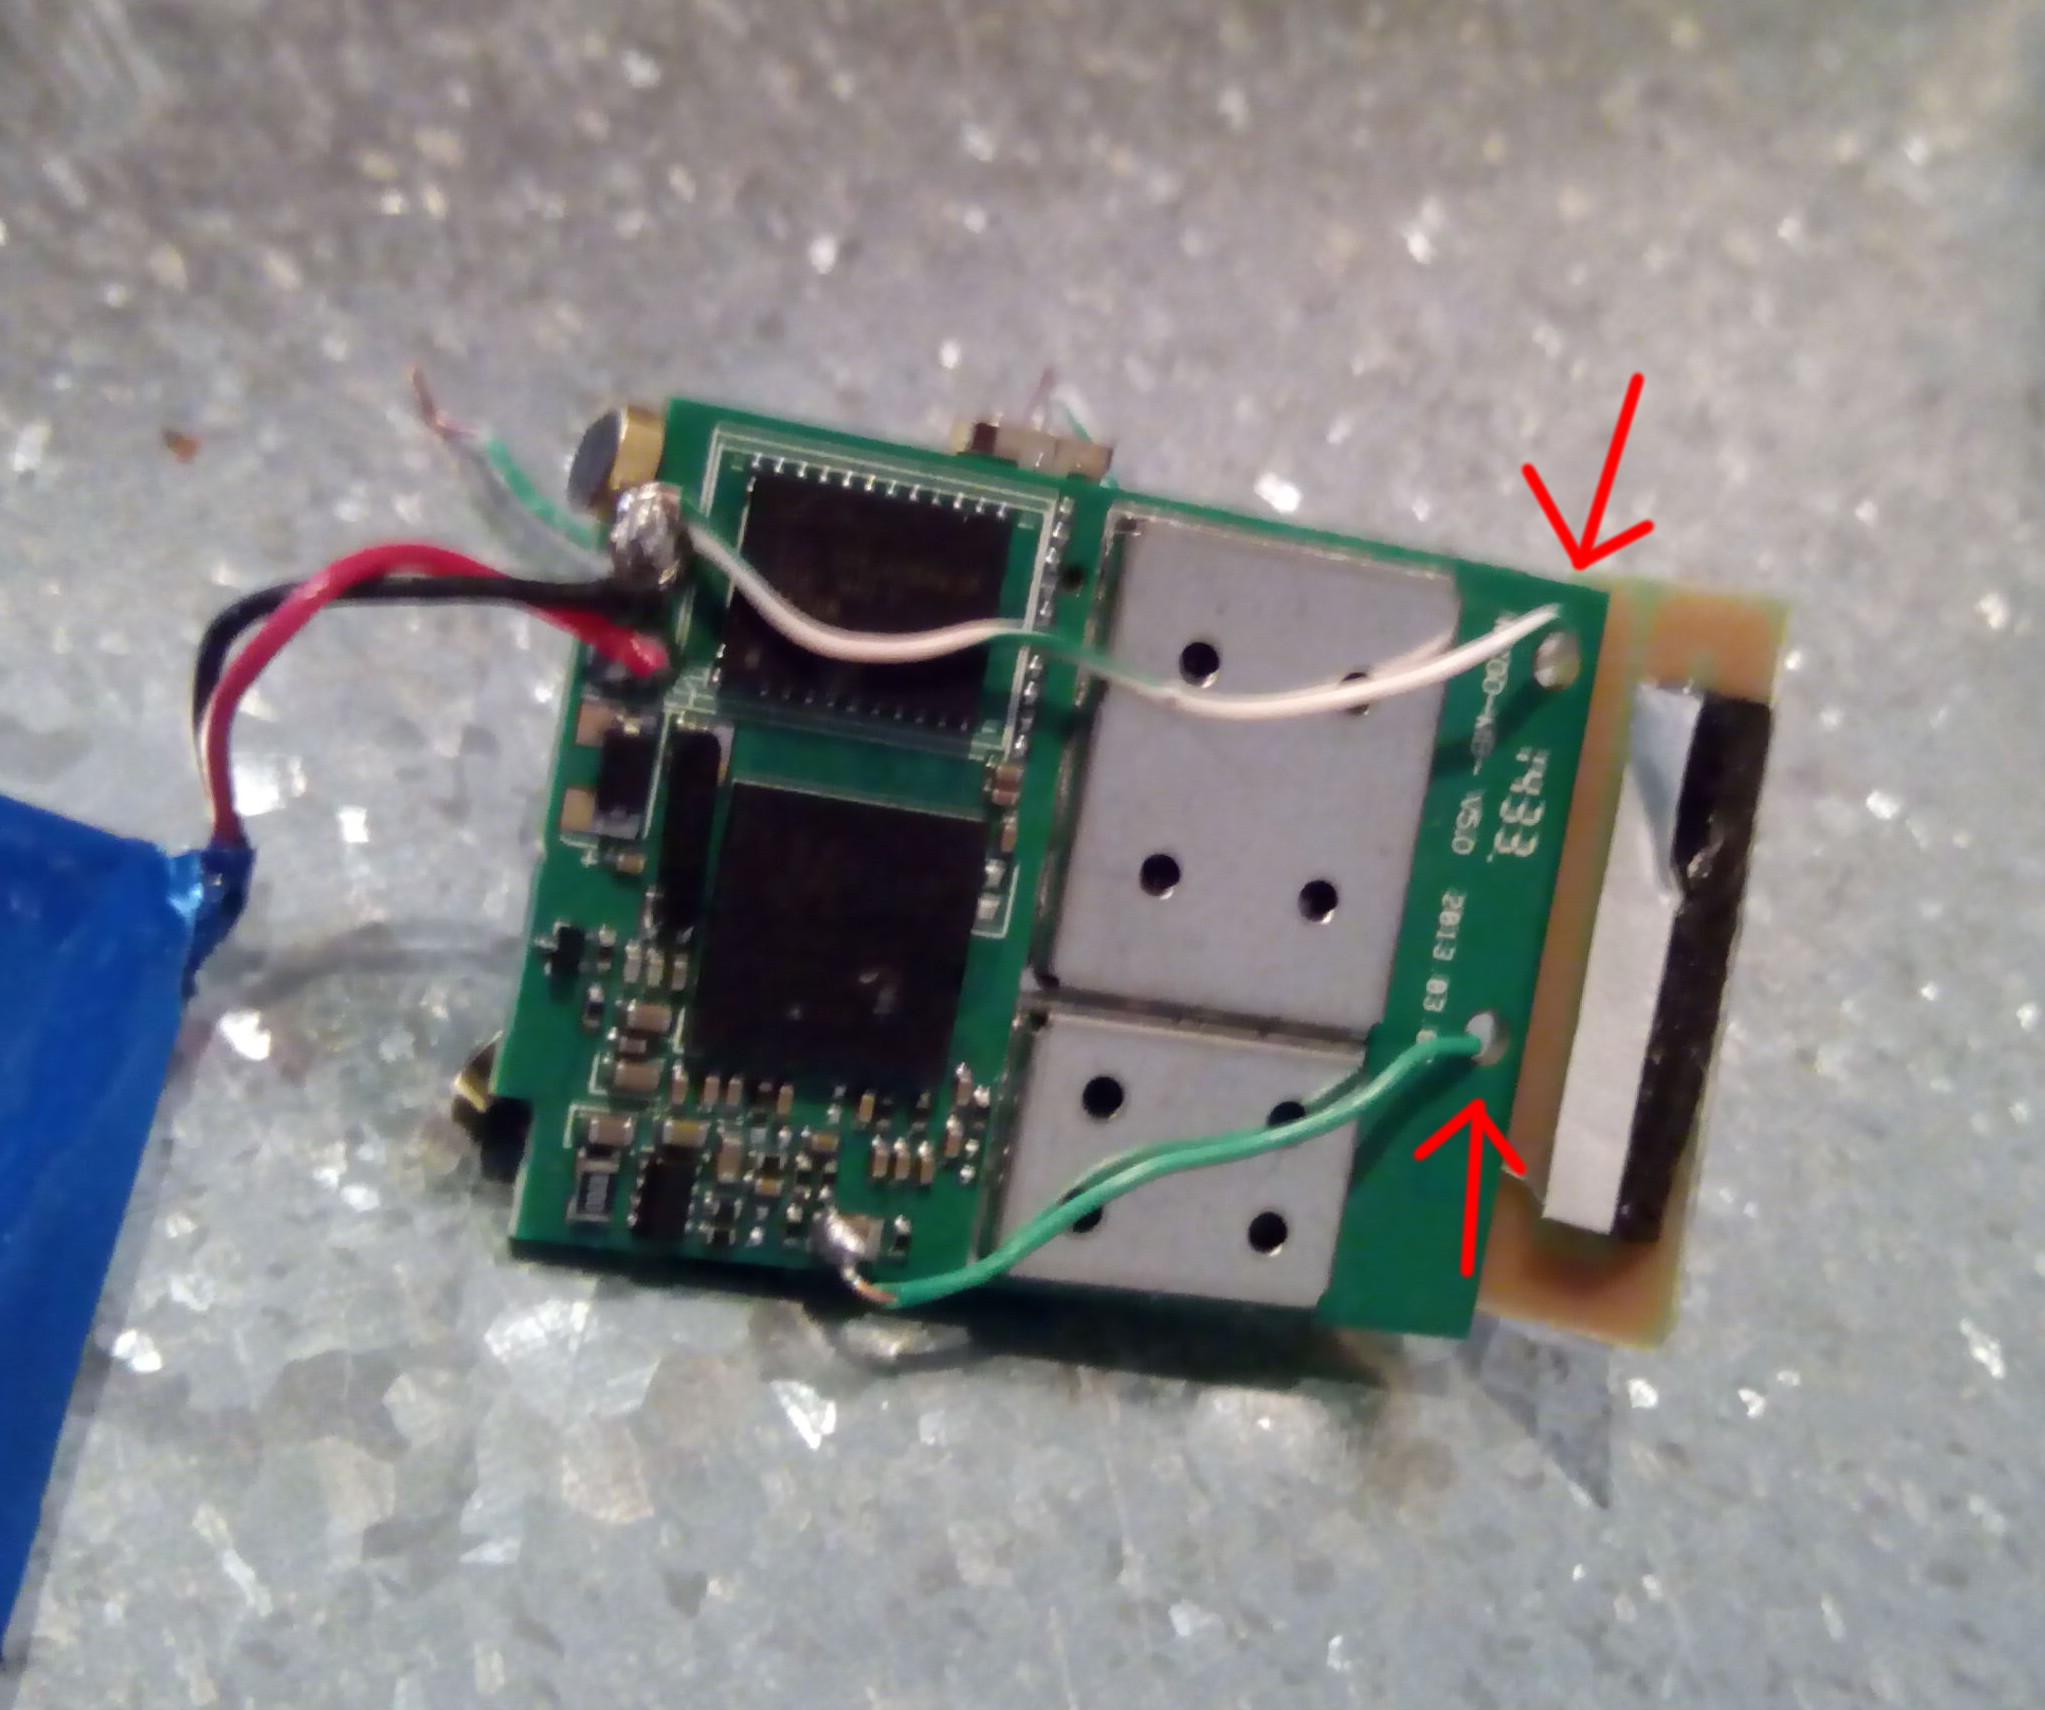
Step 1: Carefully open the protective encasement with a small screwdriver. Step 2: Find the correct spot and solder there a long enough, thin cable. You can find its whereabouts in the picture below. Just to be safe, verify the existence of adequate voltage during calls. Click on the photos to enlarge. The lower soldering point has the voltage.
 Step 3: Solder a similar cable to the ground of the lithium battery. It’s the upper soldering point in the photo above. Step 4: Next, the easiest way to take the cables outside is to pull them through those two holes you see on the PCB and then from the SIM slot opening.
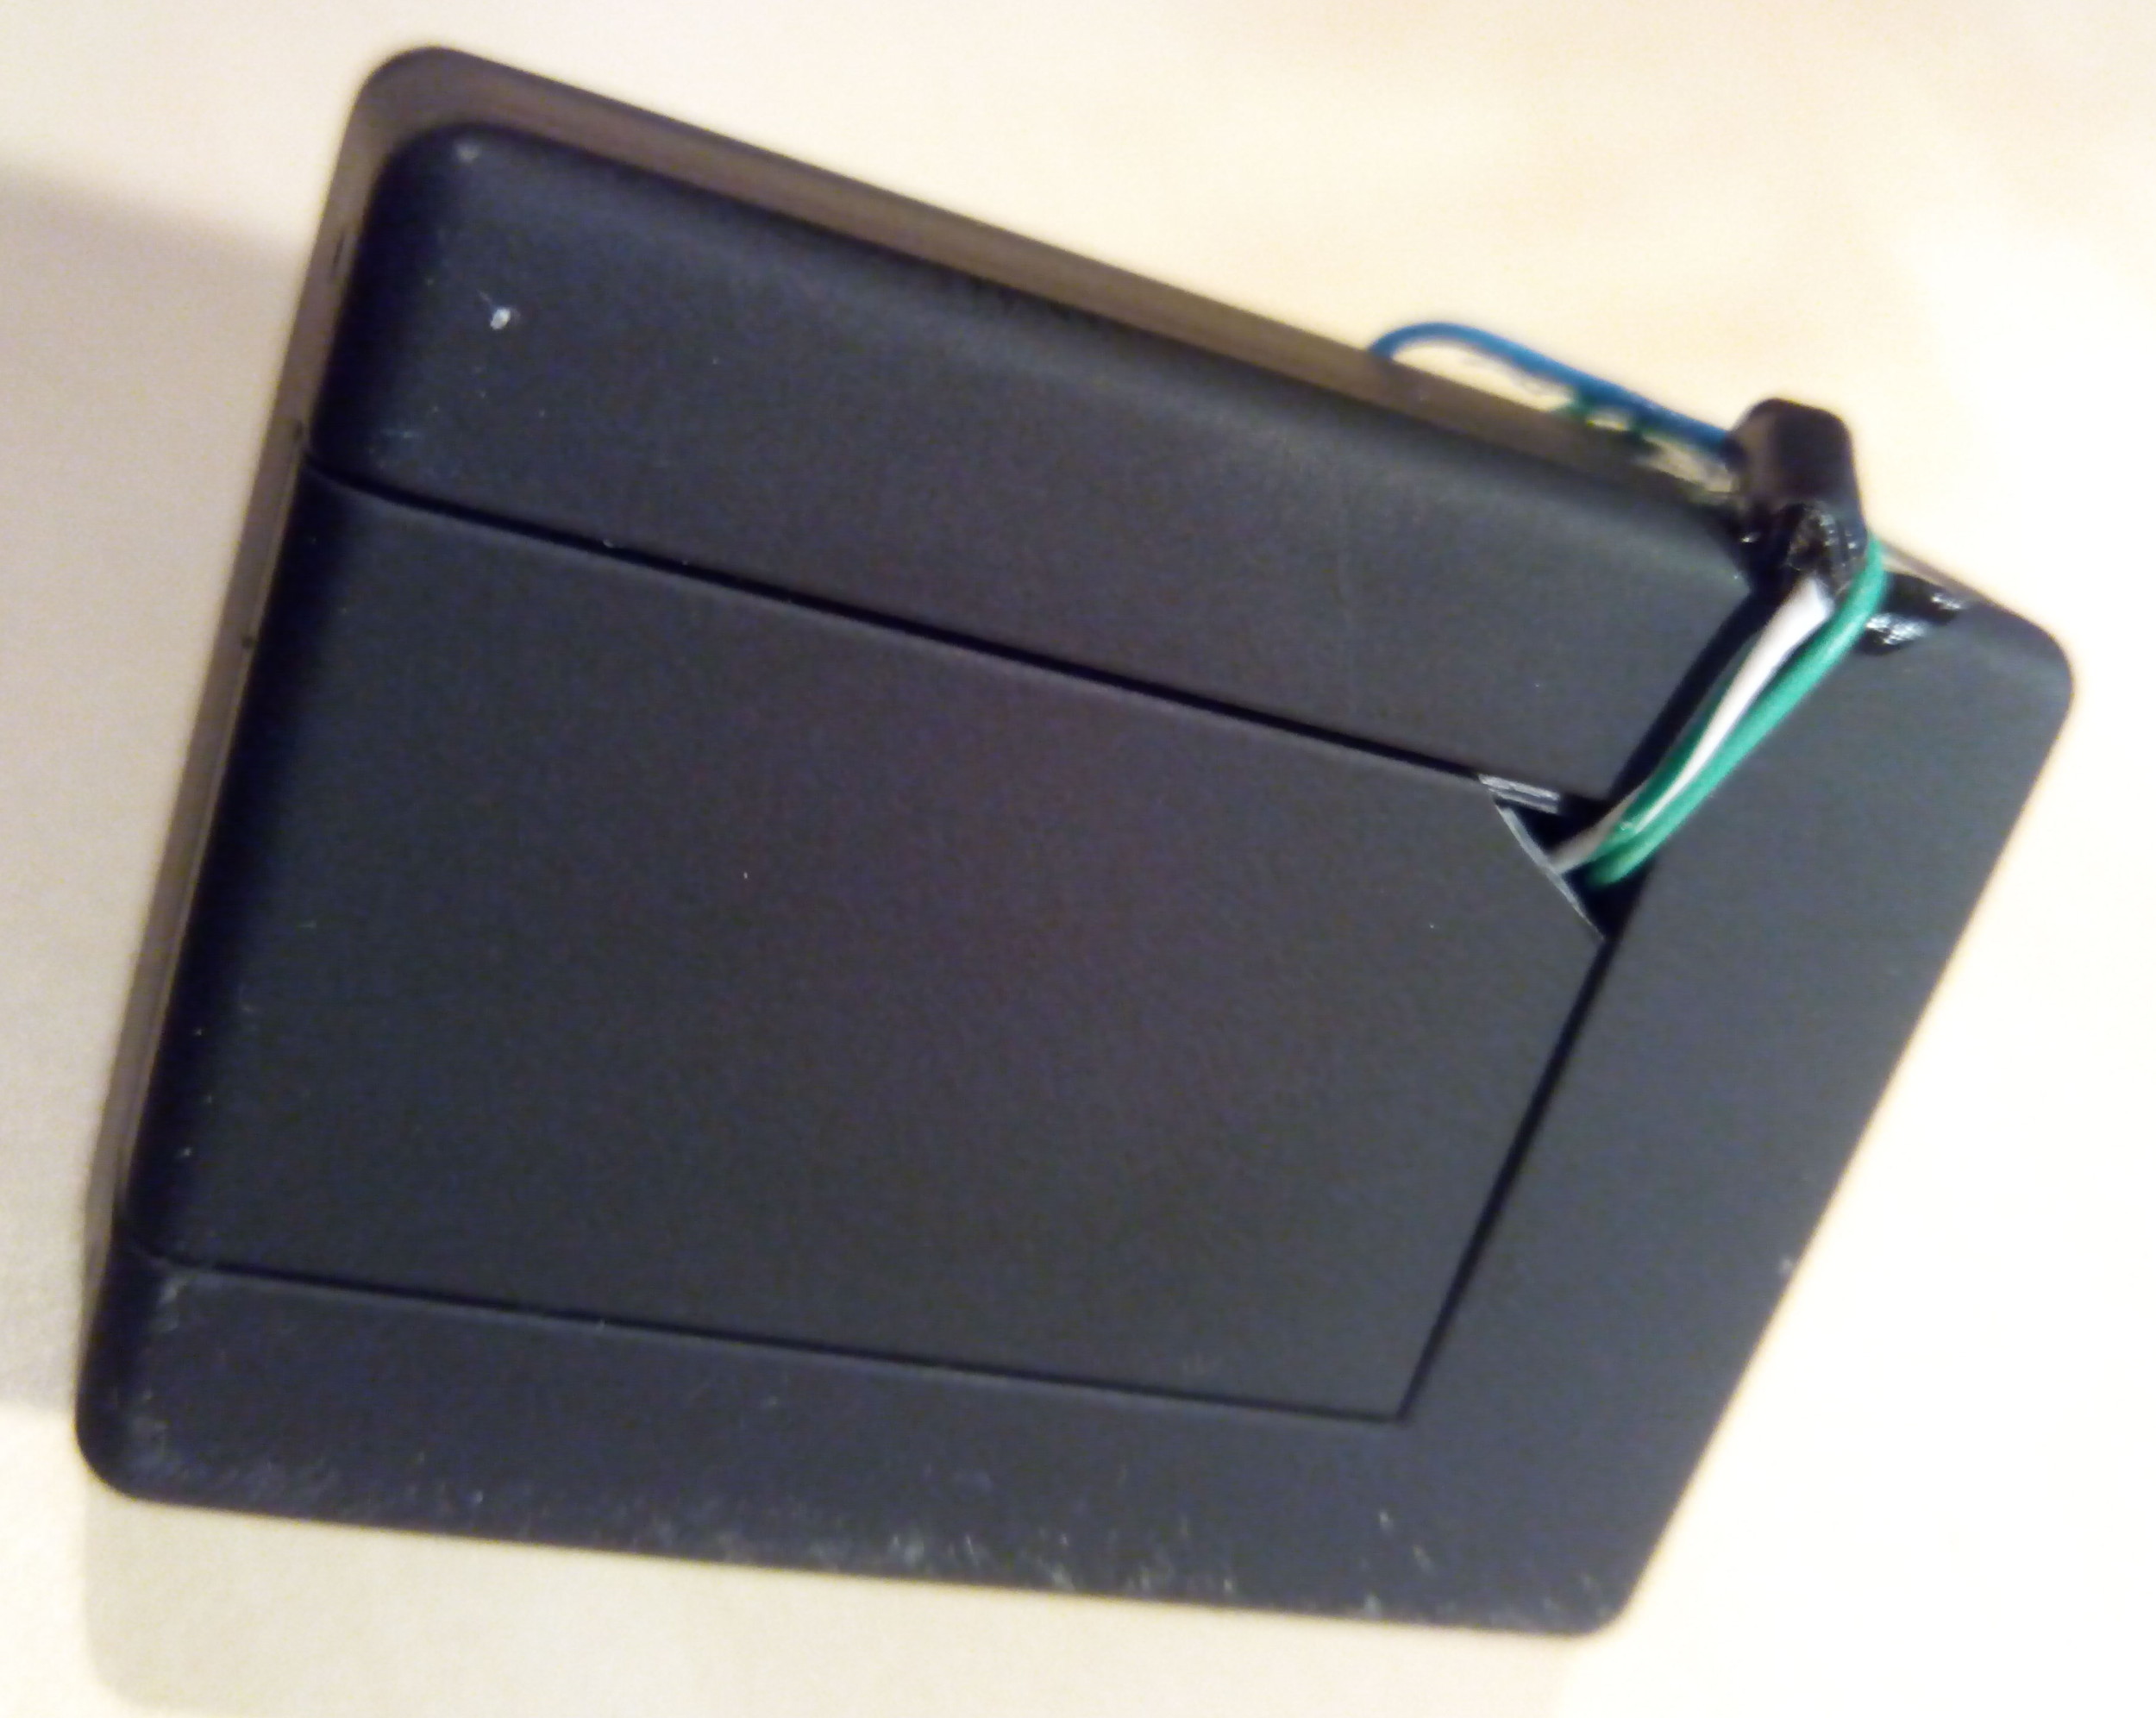
 Step 5: Reassemble the case and cut with some scissors the corner of the SIM card lid so to create just enough space for the cables to come through.
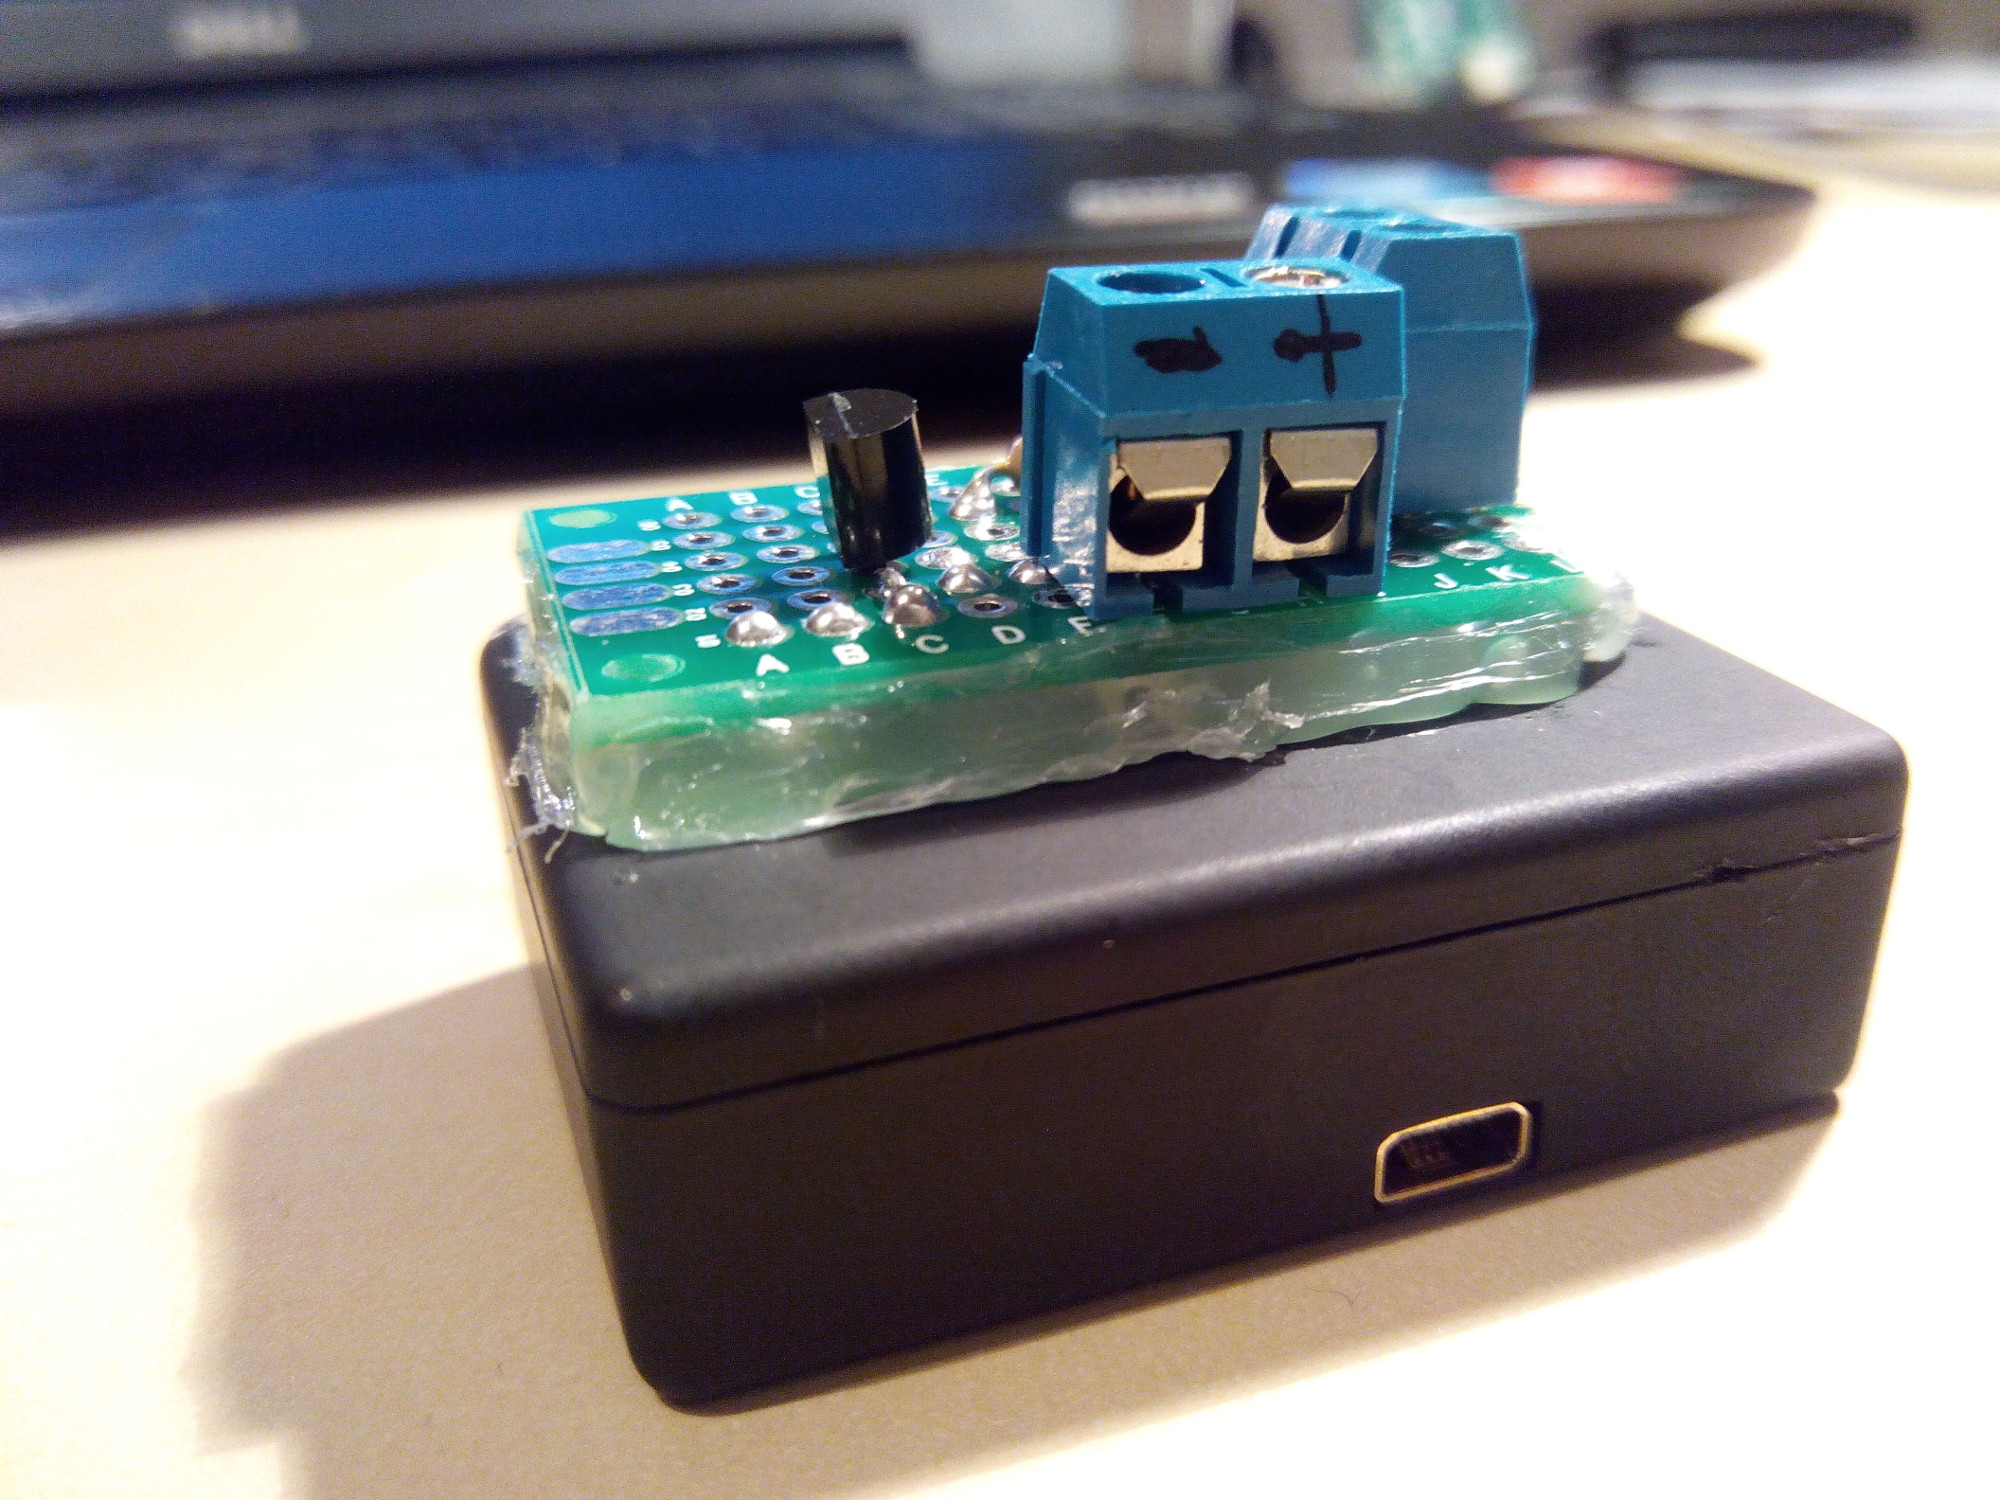
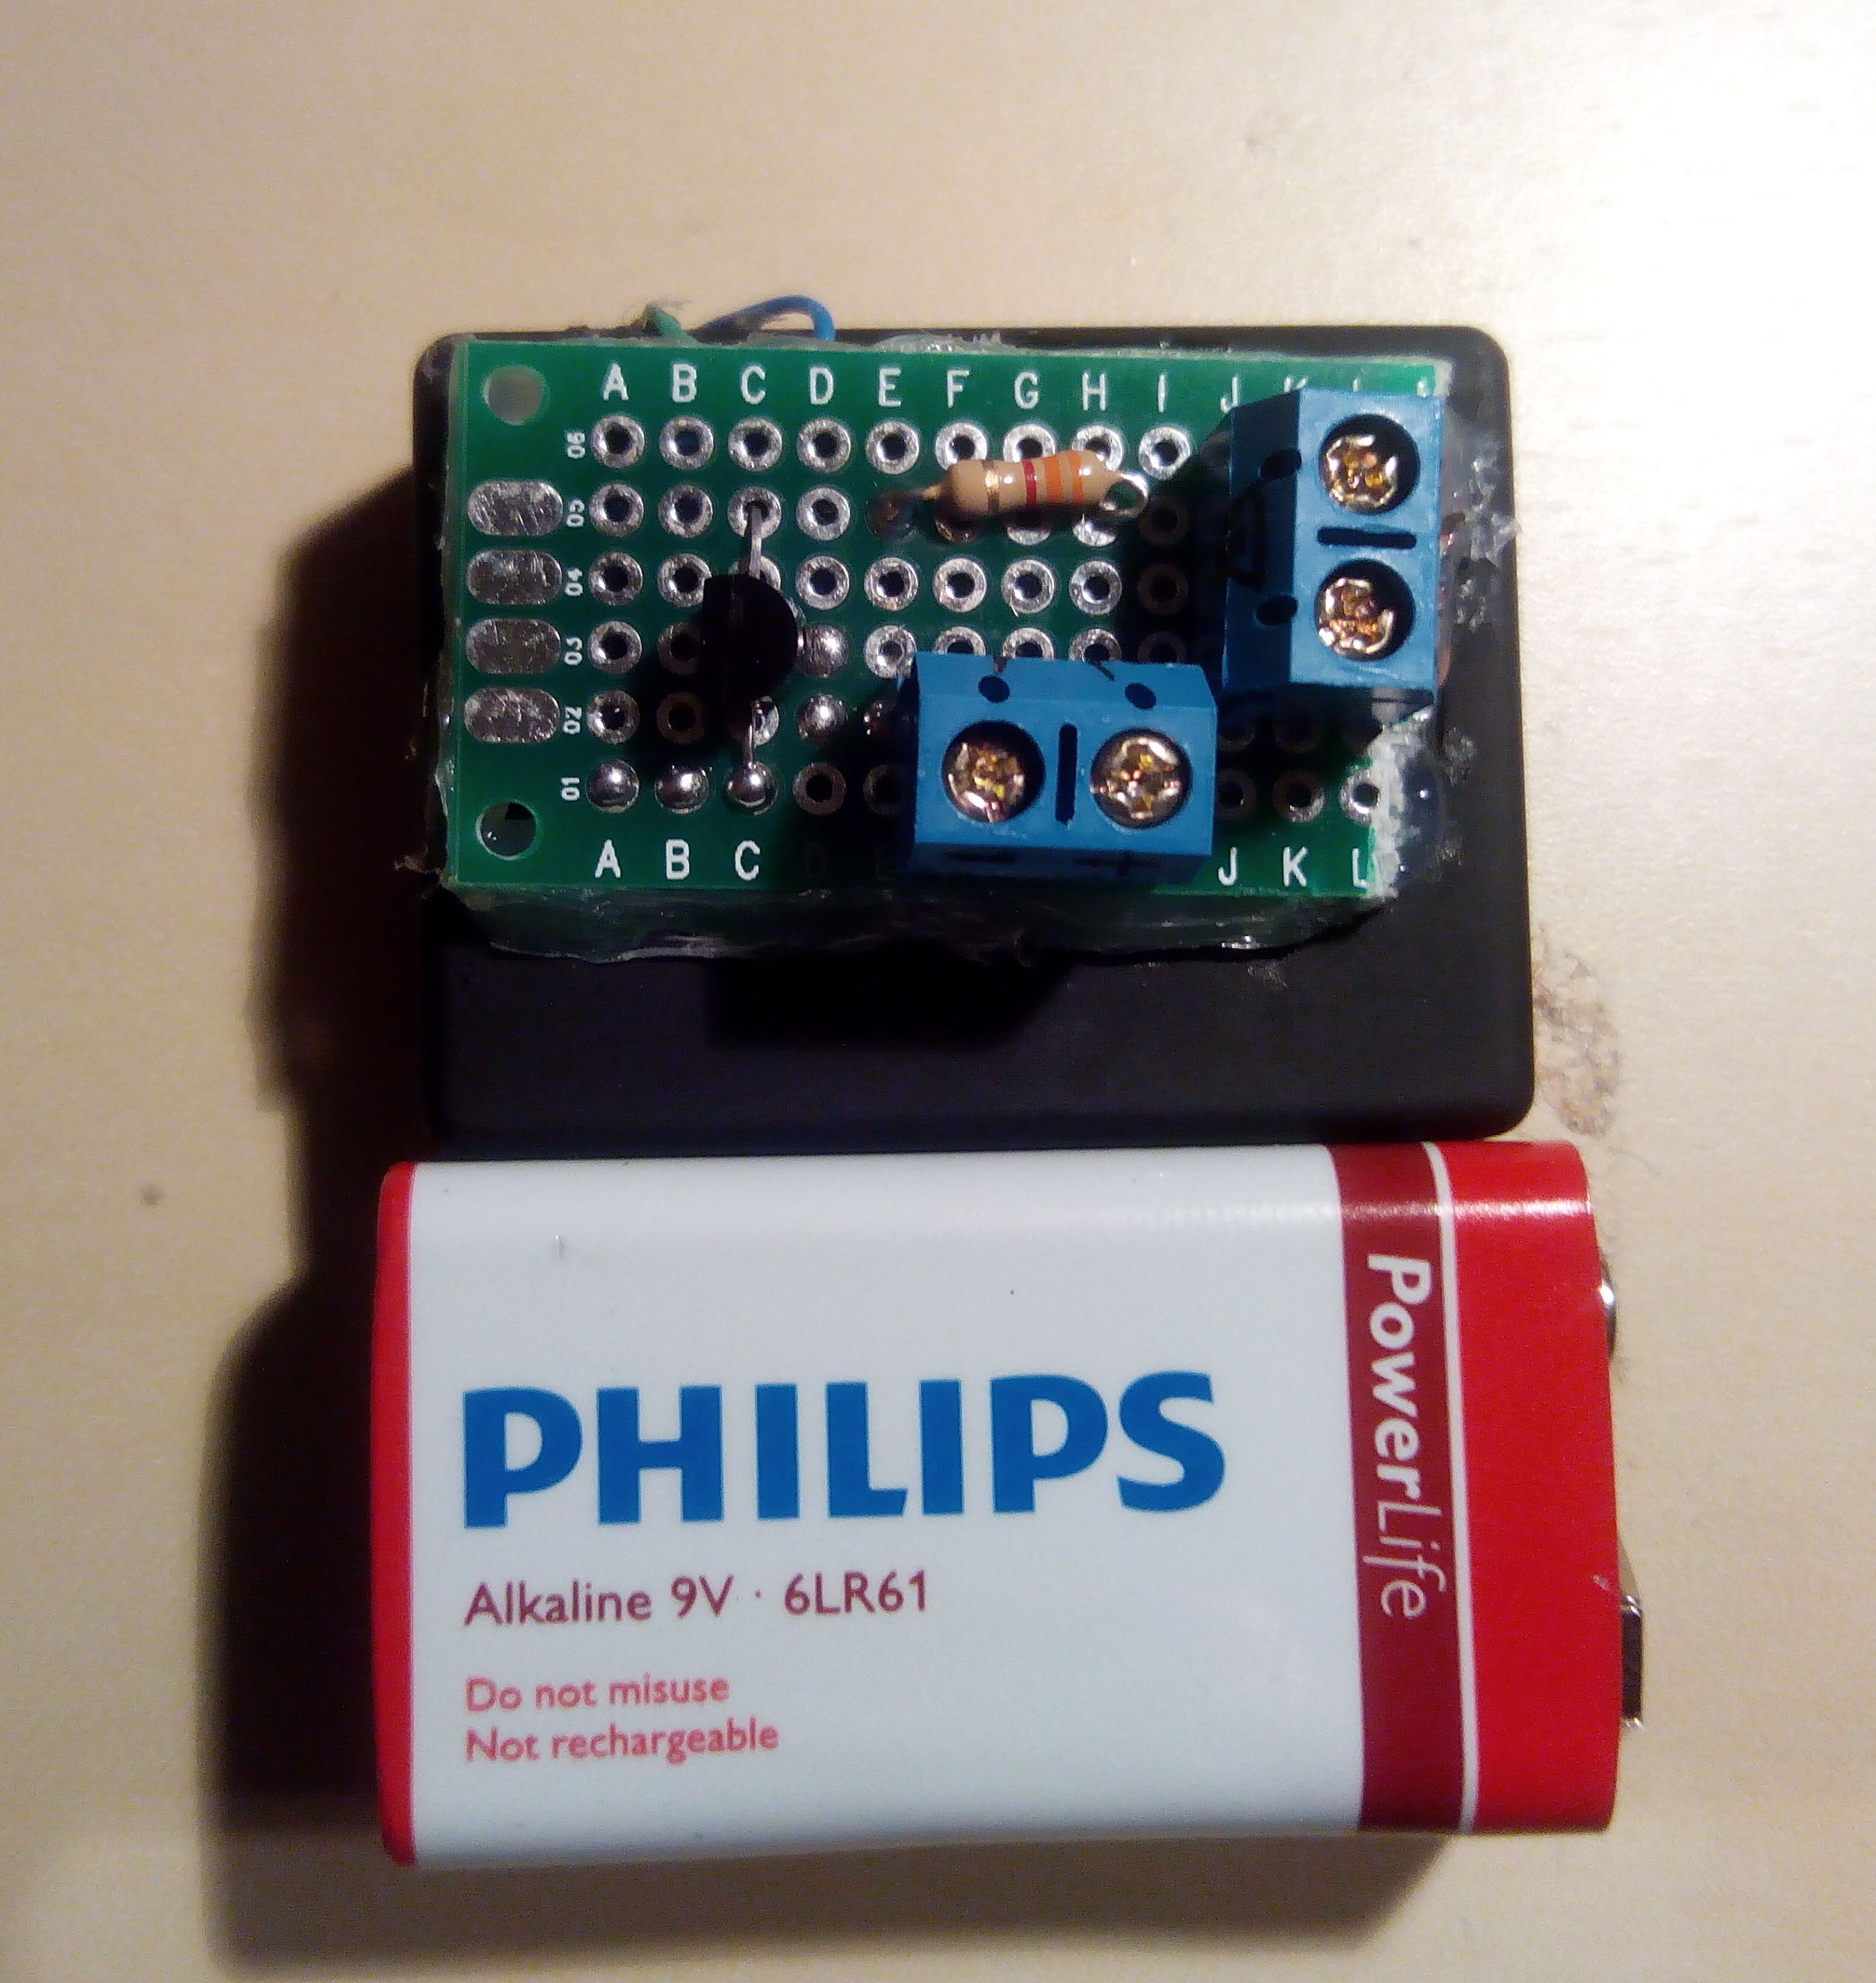
Step 6: Be creative, only your fantasy constrains you! This is my prototype, constructed on a Saturday.

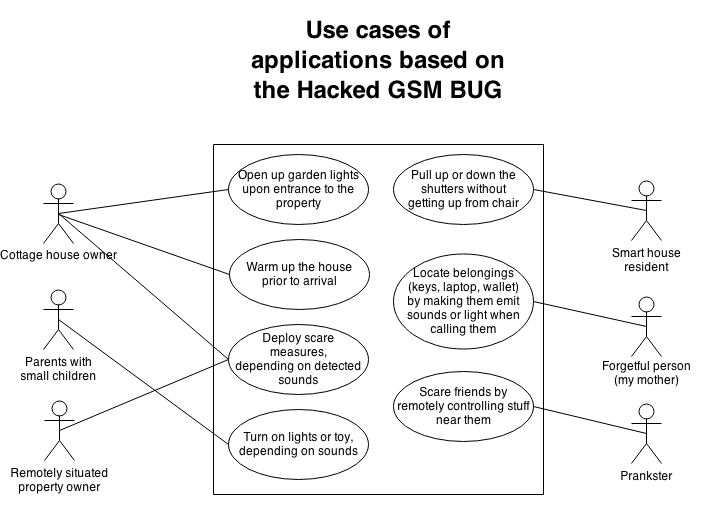
 I can think of many uses for this GSM bug hack and even if none applies to you, you can just do it because you can. I have illustrated only a handful of uses cases with potential, that I came up with just tonight, in the diagram below. Note that some of them might require the existence of a microcontroller in order to be realized.
