DIY interactive name tag
22 March 2015
Exams are over, so there was some time to make this peculiar interactive name tag. It consists of an I2C LCD screen, an ATtiny85 microcontroller and a microphone. If you are attending a conference, a workshop or something similar and you want to make an impression, keep reading!
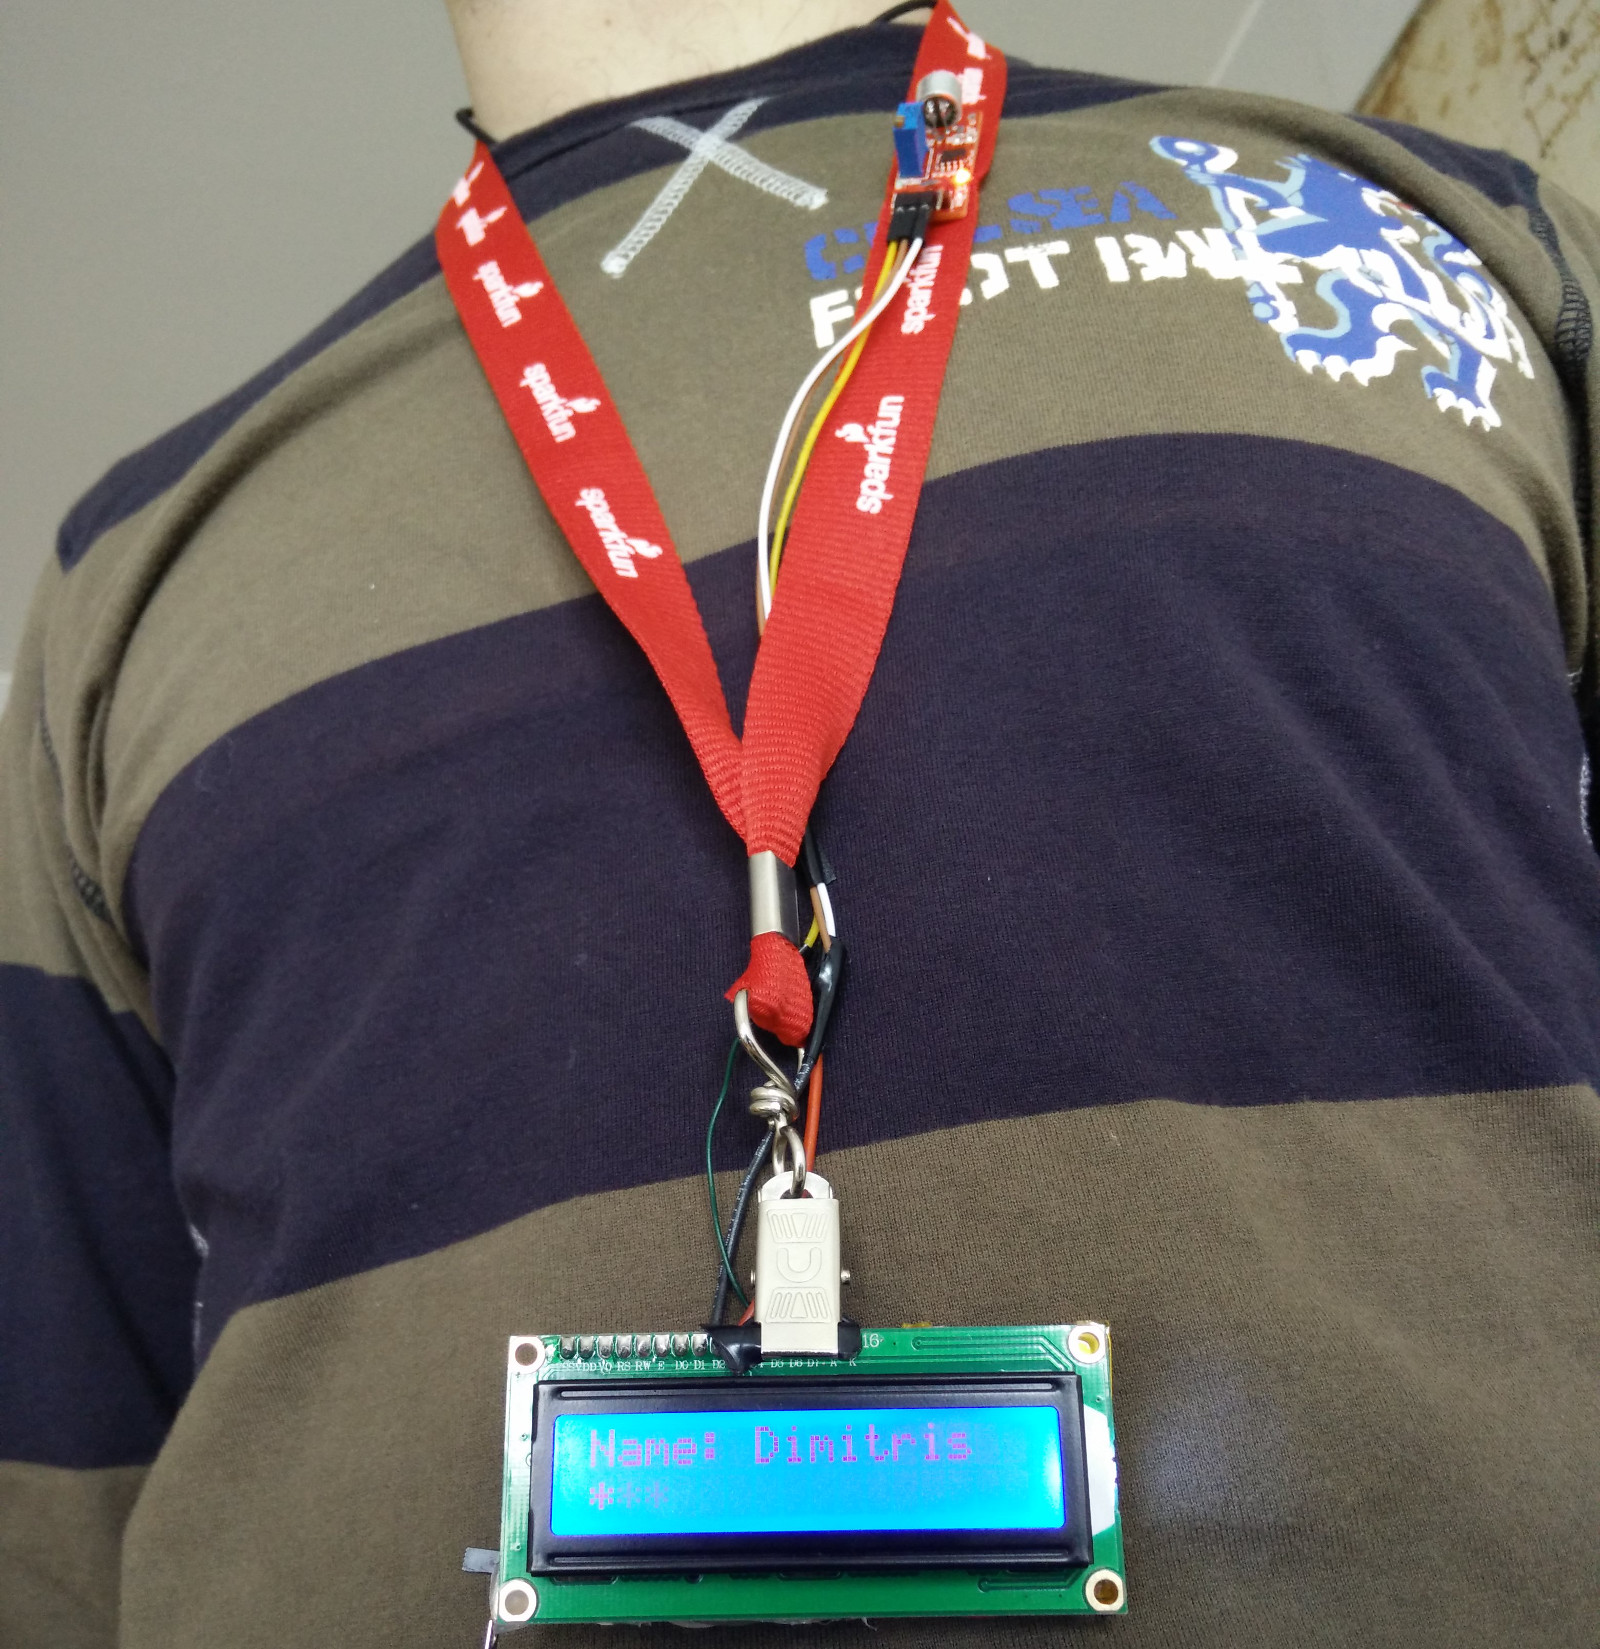
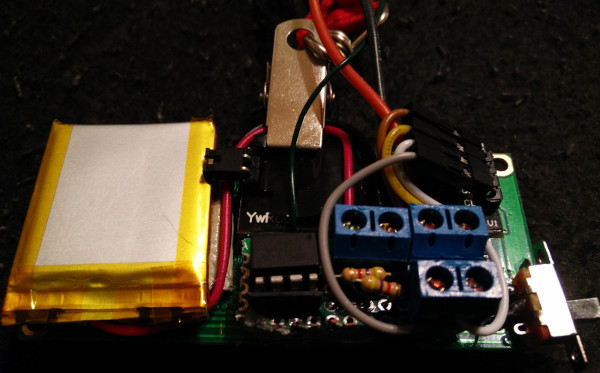
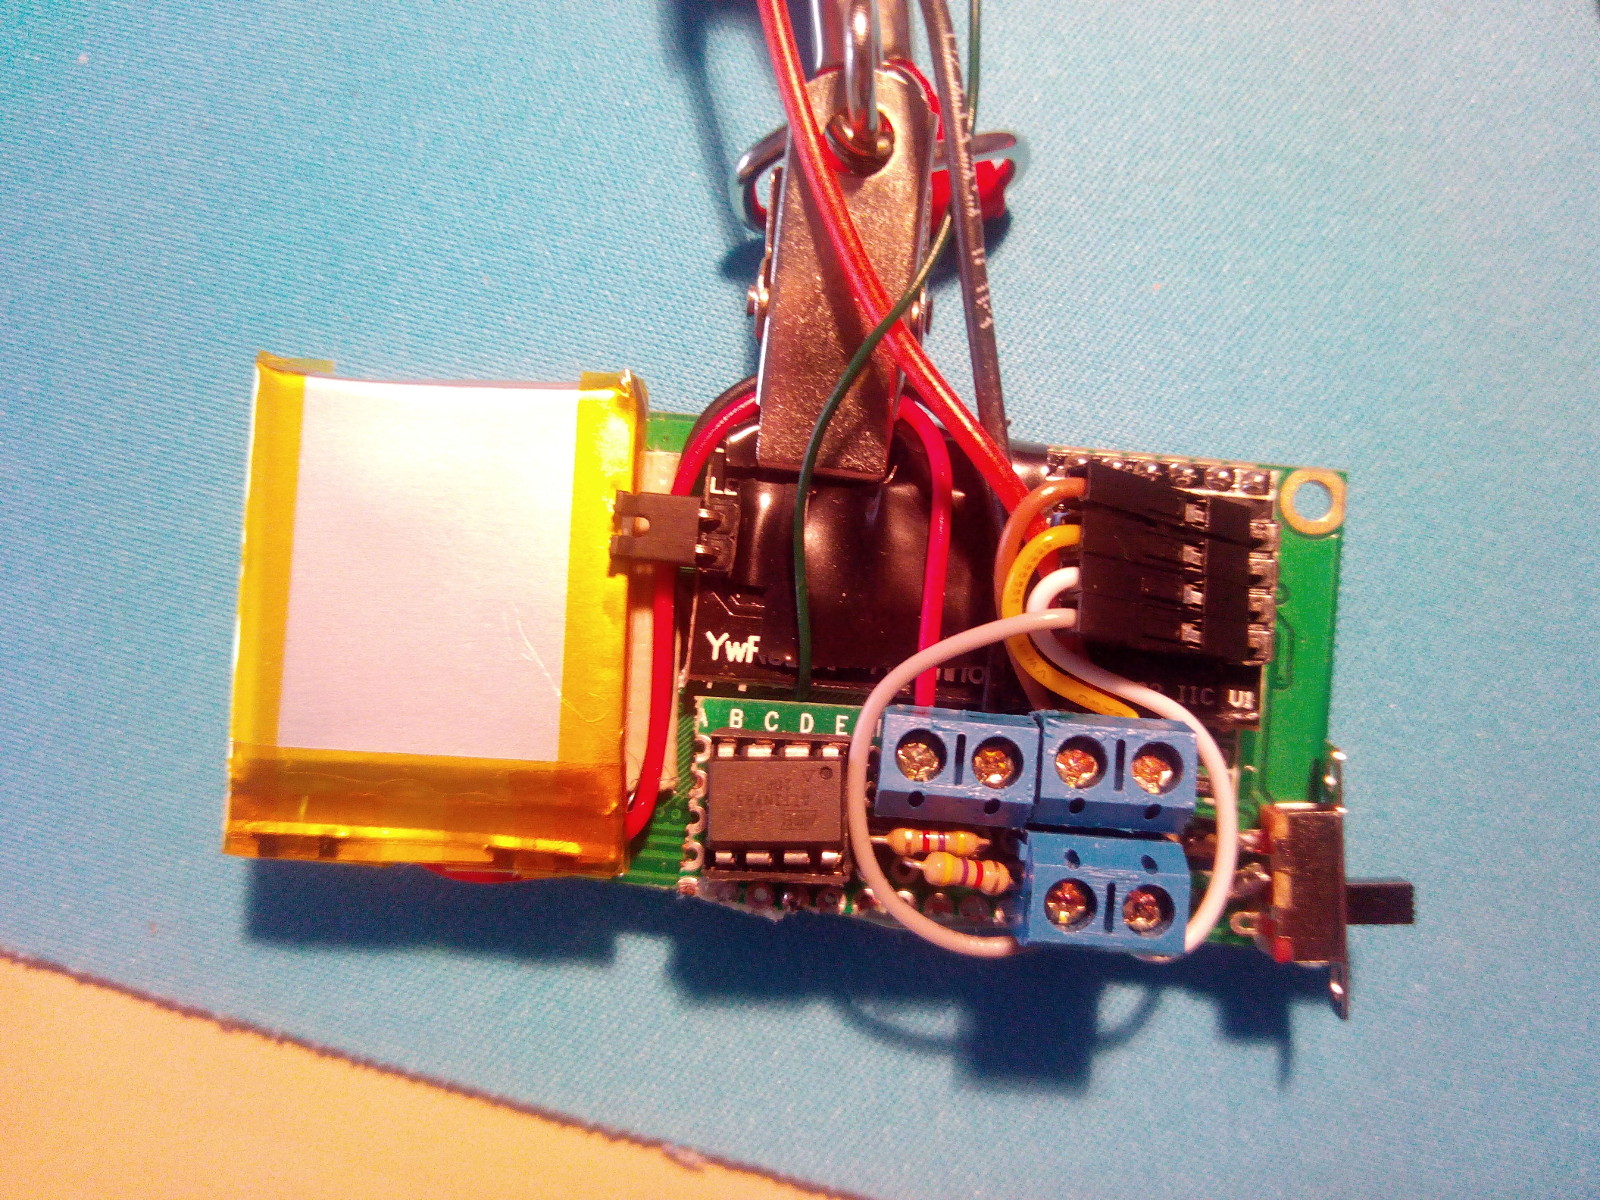
On 28th of March, it’s the long awaited Arduino Day. I volunteered for the Arduino day at Malmö and thought it would be rude to show up with empty hands. So, I bought a 500 mAh LiPo battery and made me an interactive name tag, which displays my name, my website and as it is attached to a microphone it also shows the volume of my voice! The various components are connected through terminals, which means that they are easily changeable and the system scalable. For example, an L3G4200D gyroscope or an MPL3115A2 barometric sensor can easily be aside of the LCD screen to the I2C port or the microphone to be swapped with an DS1820 thermometer. Everything, in a small package and as usual with a low price tag. Particularly, the most expensive component was the 500 mAh battery by Adafruit (10€), which I had to purchase locally, since I could not afford waiting one month for it to arrive from China. The rest of the materials used in this project cost approximately 6€.
The ATtiny85 is lately becoming my favorite microcontroller, offering low power consumption, size and price. In this case, despite its internal clock running at 1 MHz to increase battery life, it has no problem controlling the 16x2 I2C LCD screen and sampling the microphone at 20Hz. The schema below illustrates how the system is set up:

Just three ATtiny85 pins were used, two for the I2C connection and an analog for the microphone. The battery, LCD screen and the microphone are attached via terminals, in order to assure modifiability. The challenging part is to fit everything behind the screen, but I was lucky enough for the battery to be just big enough for that. Additionally, an on off switch can be glued on the side to increase the total usability of the name tag.
So, what’s next? I built this mostly as an ice breaker for the Arduino Day festivities, but I am sure its extendability can be utilized to cover more usage scenarios. If you have got a cool idea, please do let me know. :-)
Additional resources: I2C LCD arduino library (based on the work by Digispark), the ATtiny85 sketch and a quick demo video (sorry for the blurry parts).

