Make your own 10$ trackable keychain
24 November 2014
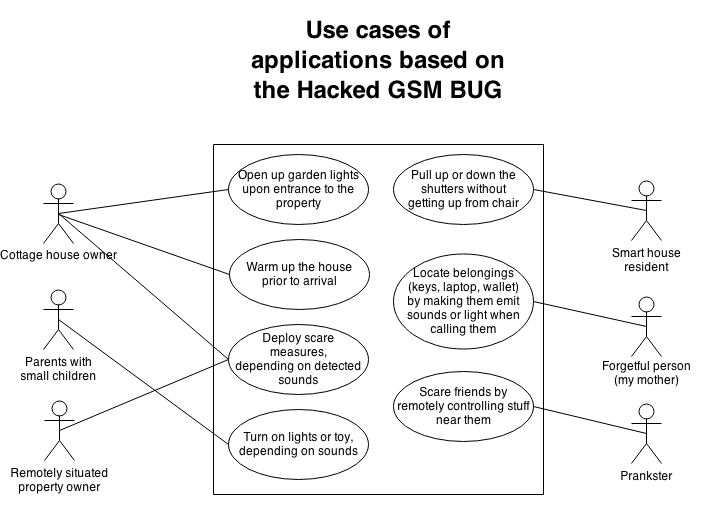
Have you seen advertisements of small, usually Bluetooth powered, tracking devices such as the TrackR bravo? Well, now it’s time to make your own… cheaper! This tutorial is a sequel of a previous article, the GSM bug hack, where by modifying an inexpensive GSM surveillance bug from China, you can end up with a simple on/off switch, controlled remotely by your phone. Various applications of this simple hack where presented as a Use Case diagram, one of which was to “Locate belongings by emitting sound or light”. My mother frequently forgets where she placed her keys, so time to make her life a little easier. Also, this device could be very helpful to visually impaired persons, when trying to locate their belongings.
Note: If you want to understand more about the context, please do read the previous article here or a shorter version at here. You can also find these instructions at instructables.
Materials:
The first thing you need, except a GSM bug of course, is the tiniest buzzer you can find. After looking around, I discovered this 9x4.2mm buzzer. The seller, John, is very helpful and if you contact him he should be able to fix you with smaller quantities. I bought 10 pieces for 7.80$. Finally, you will need a NPN transistor, such as the BC547 and you are good to go.
Tools:
- Soldering iron
- Drill
Step 1: After cracking up the GSM bug’s case, use your drill to carefully make a hole for the buzzer and two for the key chain mount. You can see where I chose to drill in photos at the end of this article.
Step 2: Solder two cables on the buzzer. It’s easier to do that now than later.
Step 3: Determine where the positive pole of the LiPo battery is connected to the board with a red wire. Pass the soldered cable to the buzzer’s positive pin through one of the holes of the board to reach at the positive pole, on the other side. Align the buzzer with the hole drilled for it, stretch the cable towards the battery’s positive pole, cut the excess part and solder it. This part and the following two might be tricky if your soldering and handcraft skills are poor like mine.
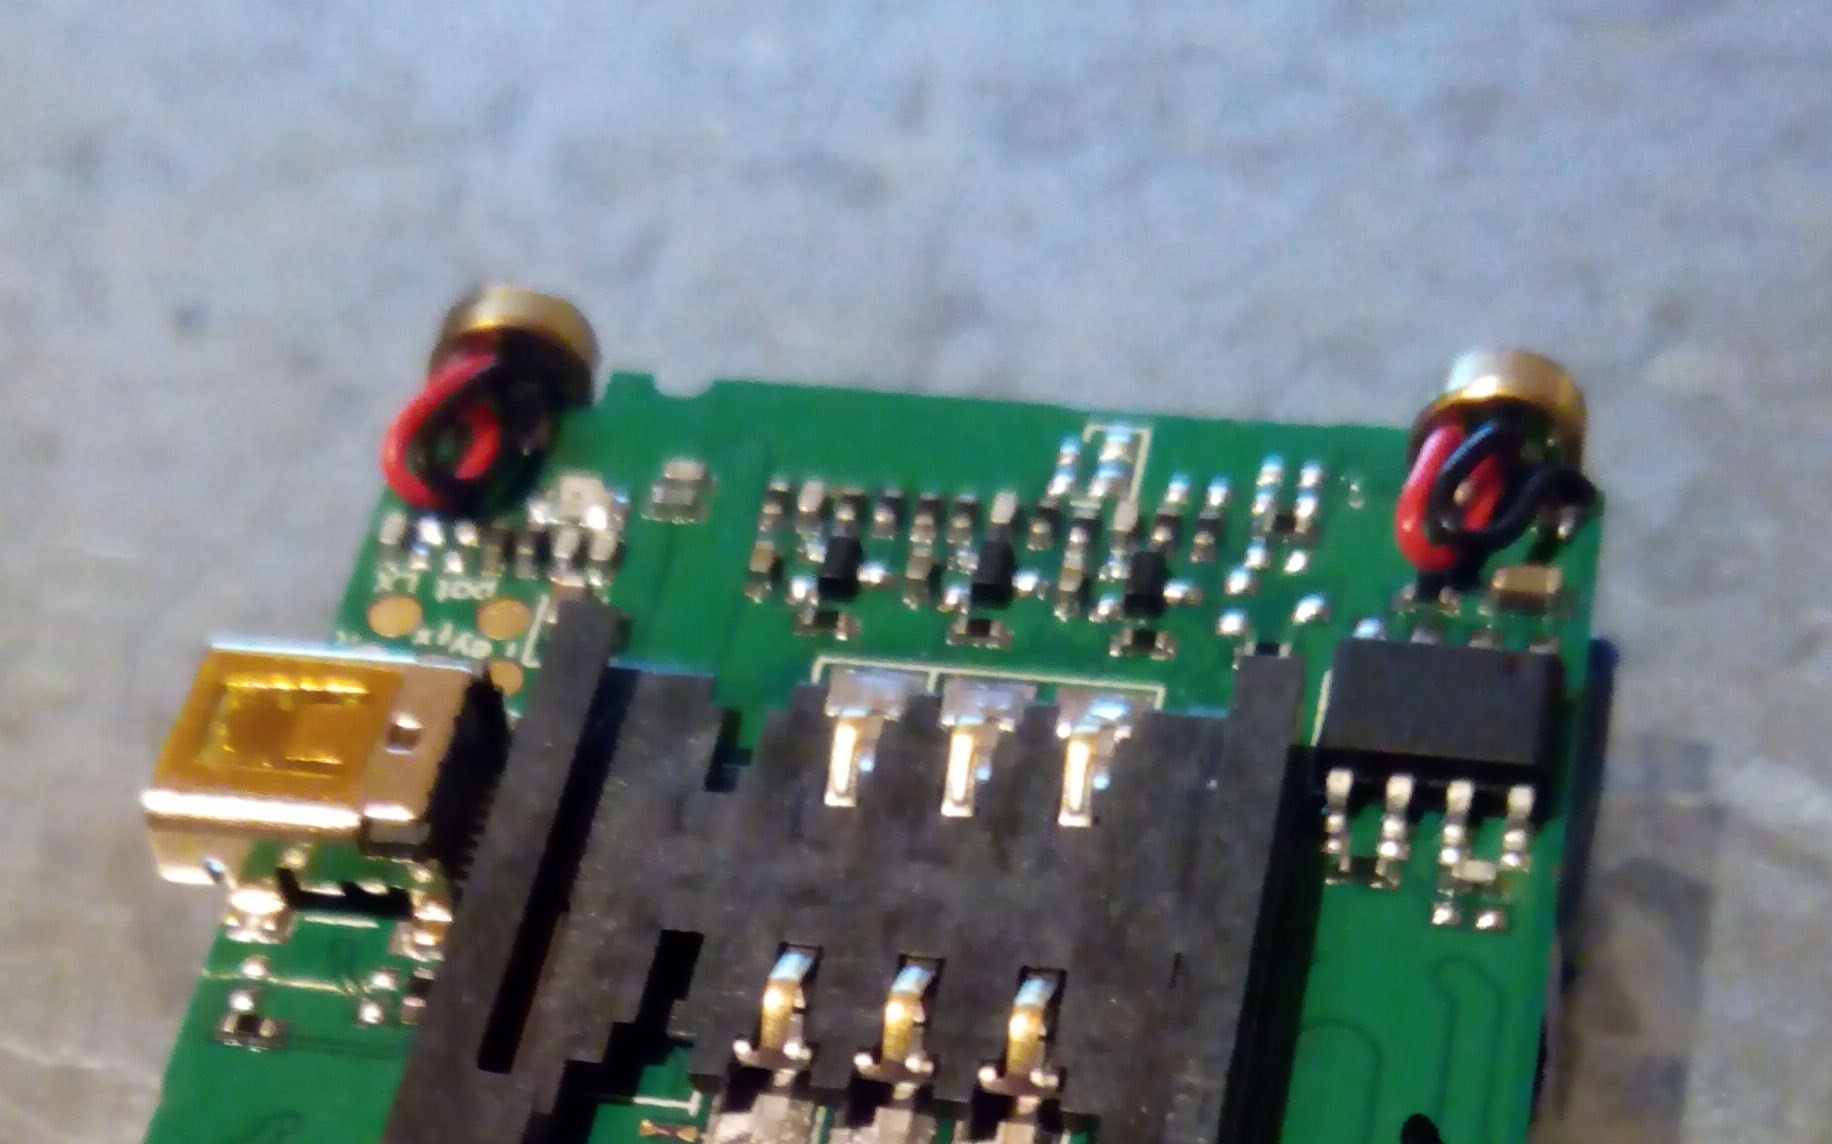
Step 4: Locate the salvageable point, which is charged with 2 Volts during calls. Solder a cable to the base pin of the transistor, pass it through the hole and reach to that spot. Cut the excess. Before you do anything else, solder another cable to the emitter. This cable, you should connect to the negative pole of the battery, right next to the positive one. You will distinguish it, by the black wire. Finish up with all the soldering and don’t forget to remove any excess cable. Try not to cut too much or to little. I messed up here once and I had to start from the beginning. Below, you can see how my wiring looks like in the end:
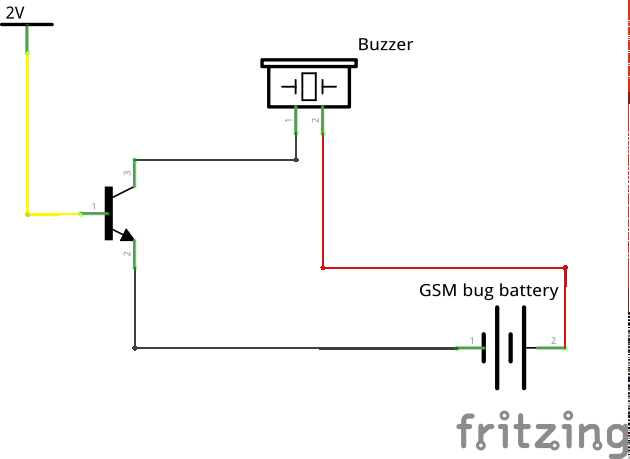
Step 5: Solder the cable coming out of the buzzer’s negative pin to the collector of the transistor, while making sure that they are relatively close to each other so to fit in the constrained space. Verify that nothing short circuits. Note that powering the buzzer straight from the 2 Volt signal will not work, I tried it. Take a look at the result and the schematic:
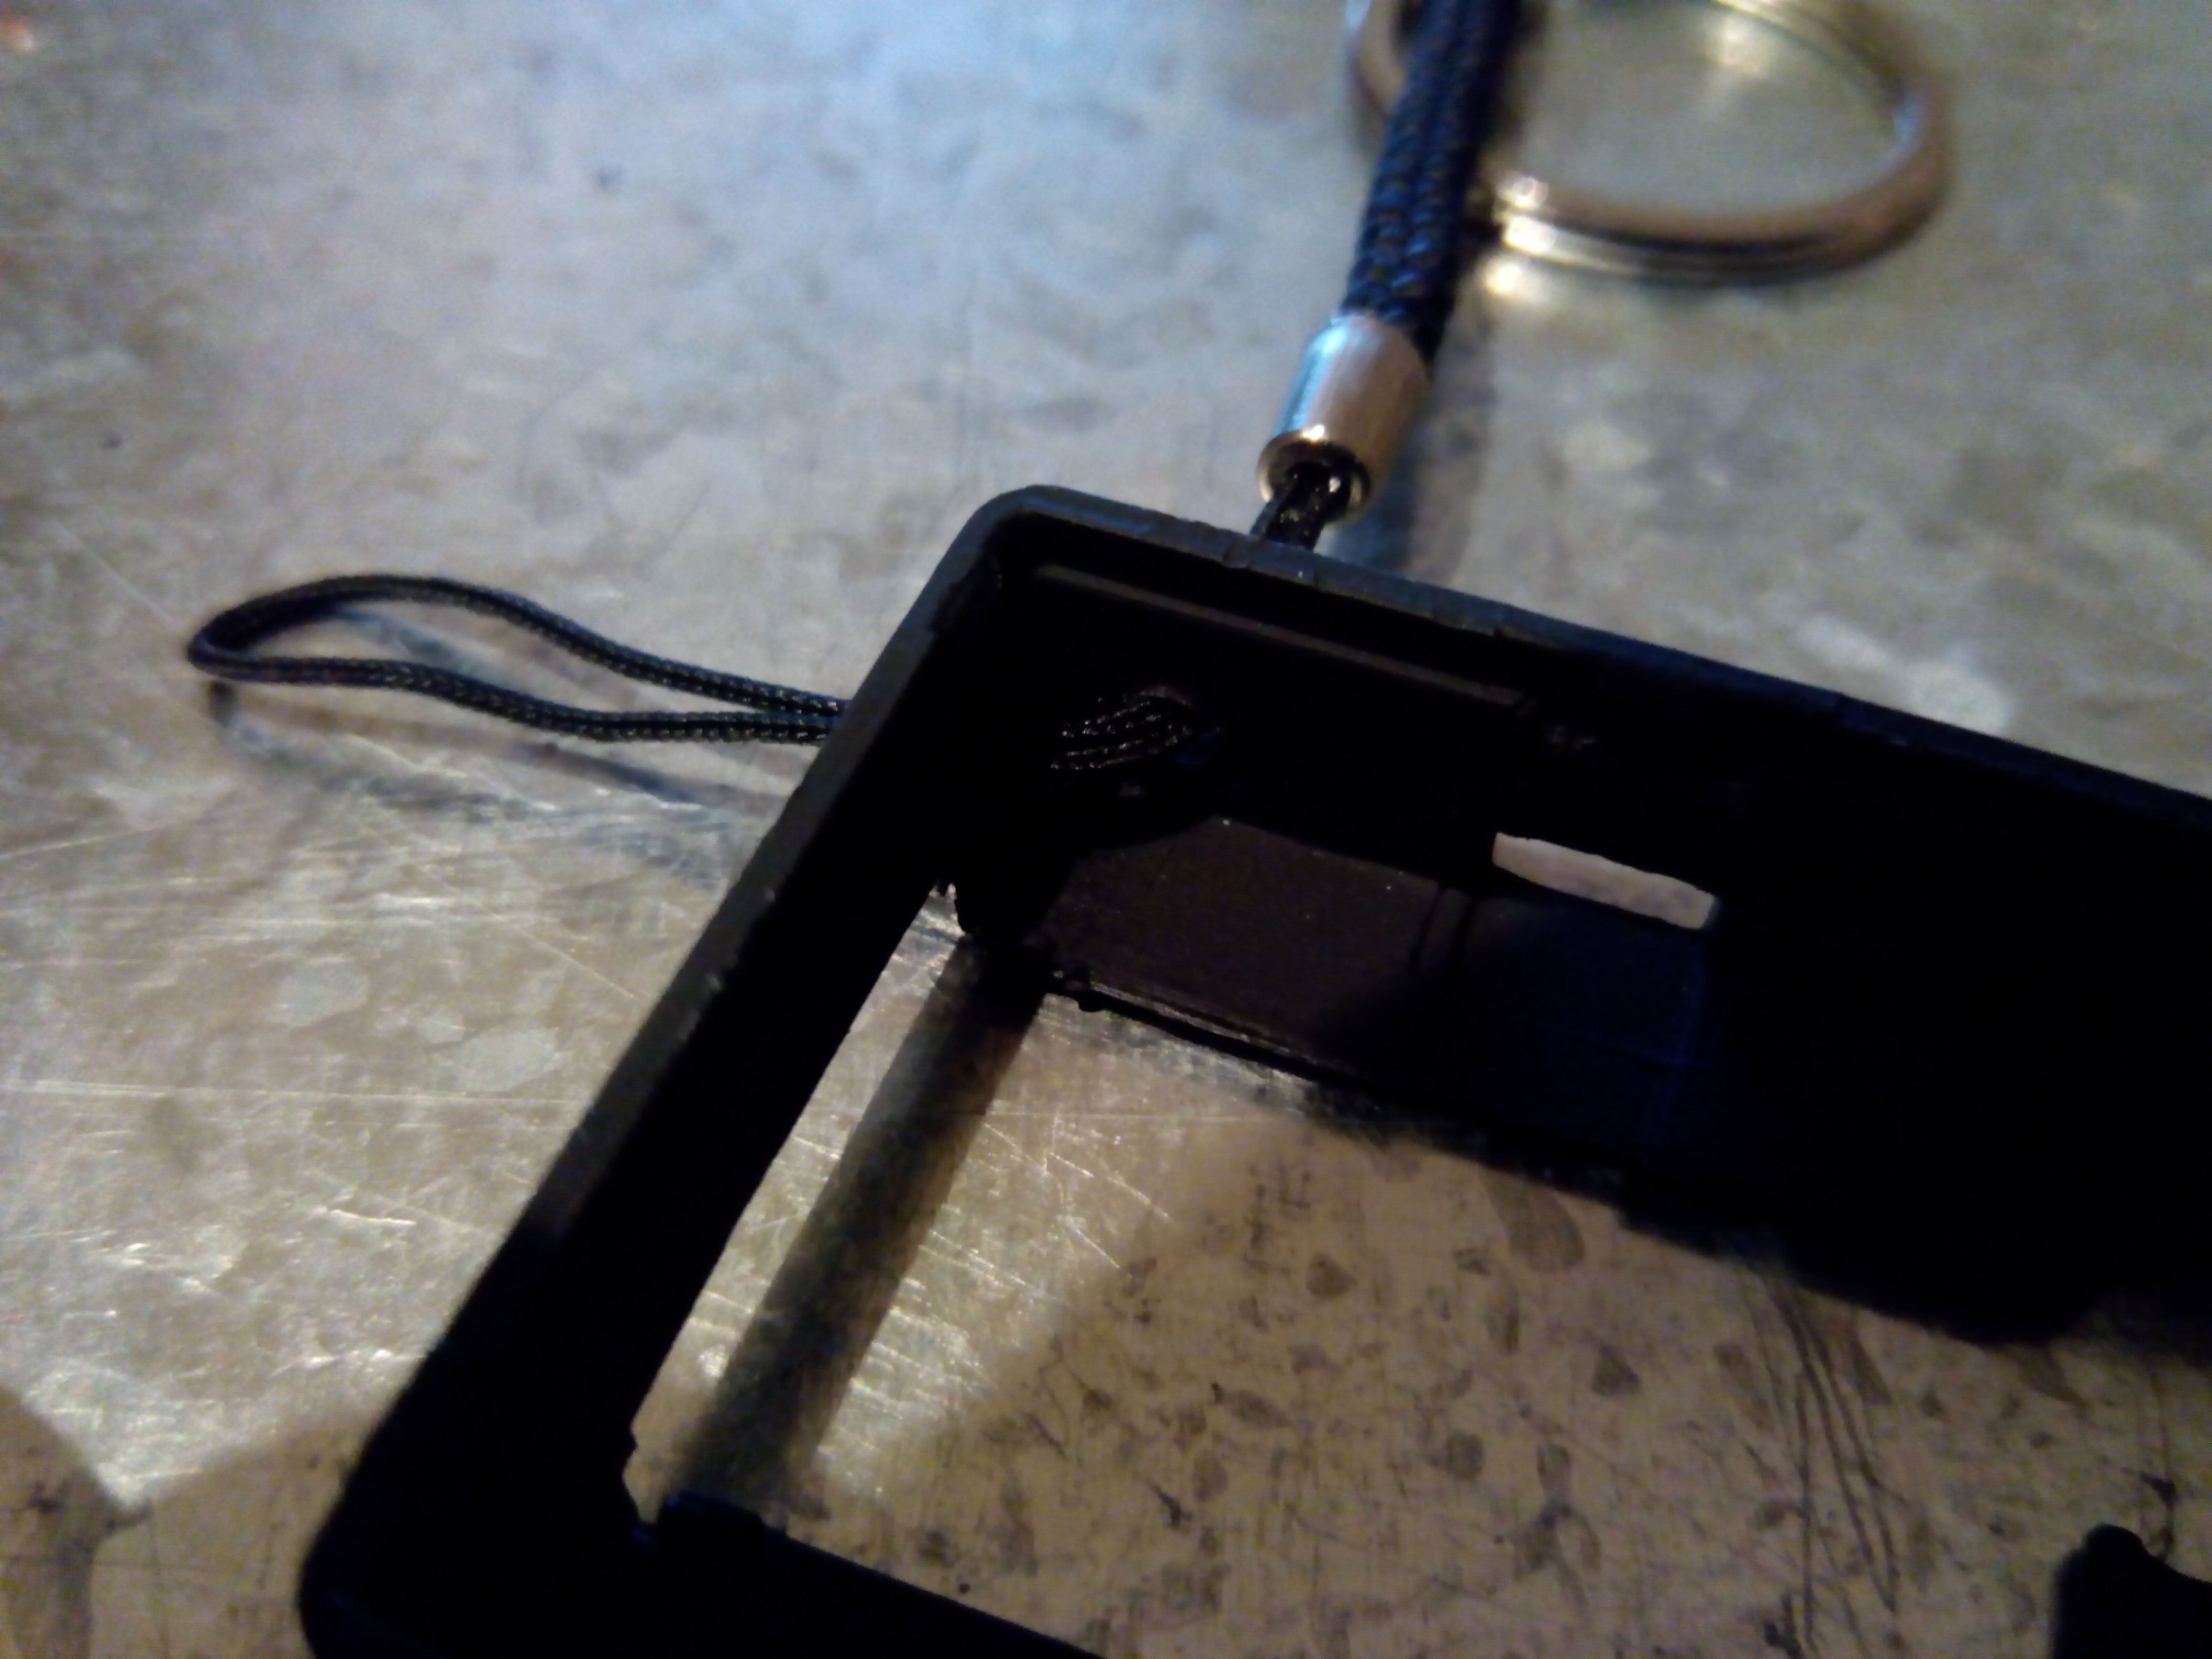
Step 6: Mount the key chain on the case. In the photo below, additionally notice where the hole for the buzzer is. Part of the sliding lid was also drilled off.
Step 7: Chop those two microphones off the board, so you won’t have to listen to the buzzer from your phone’s speaker.
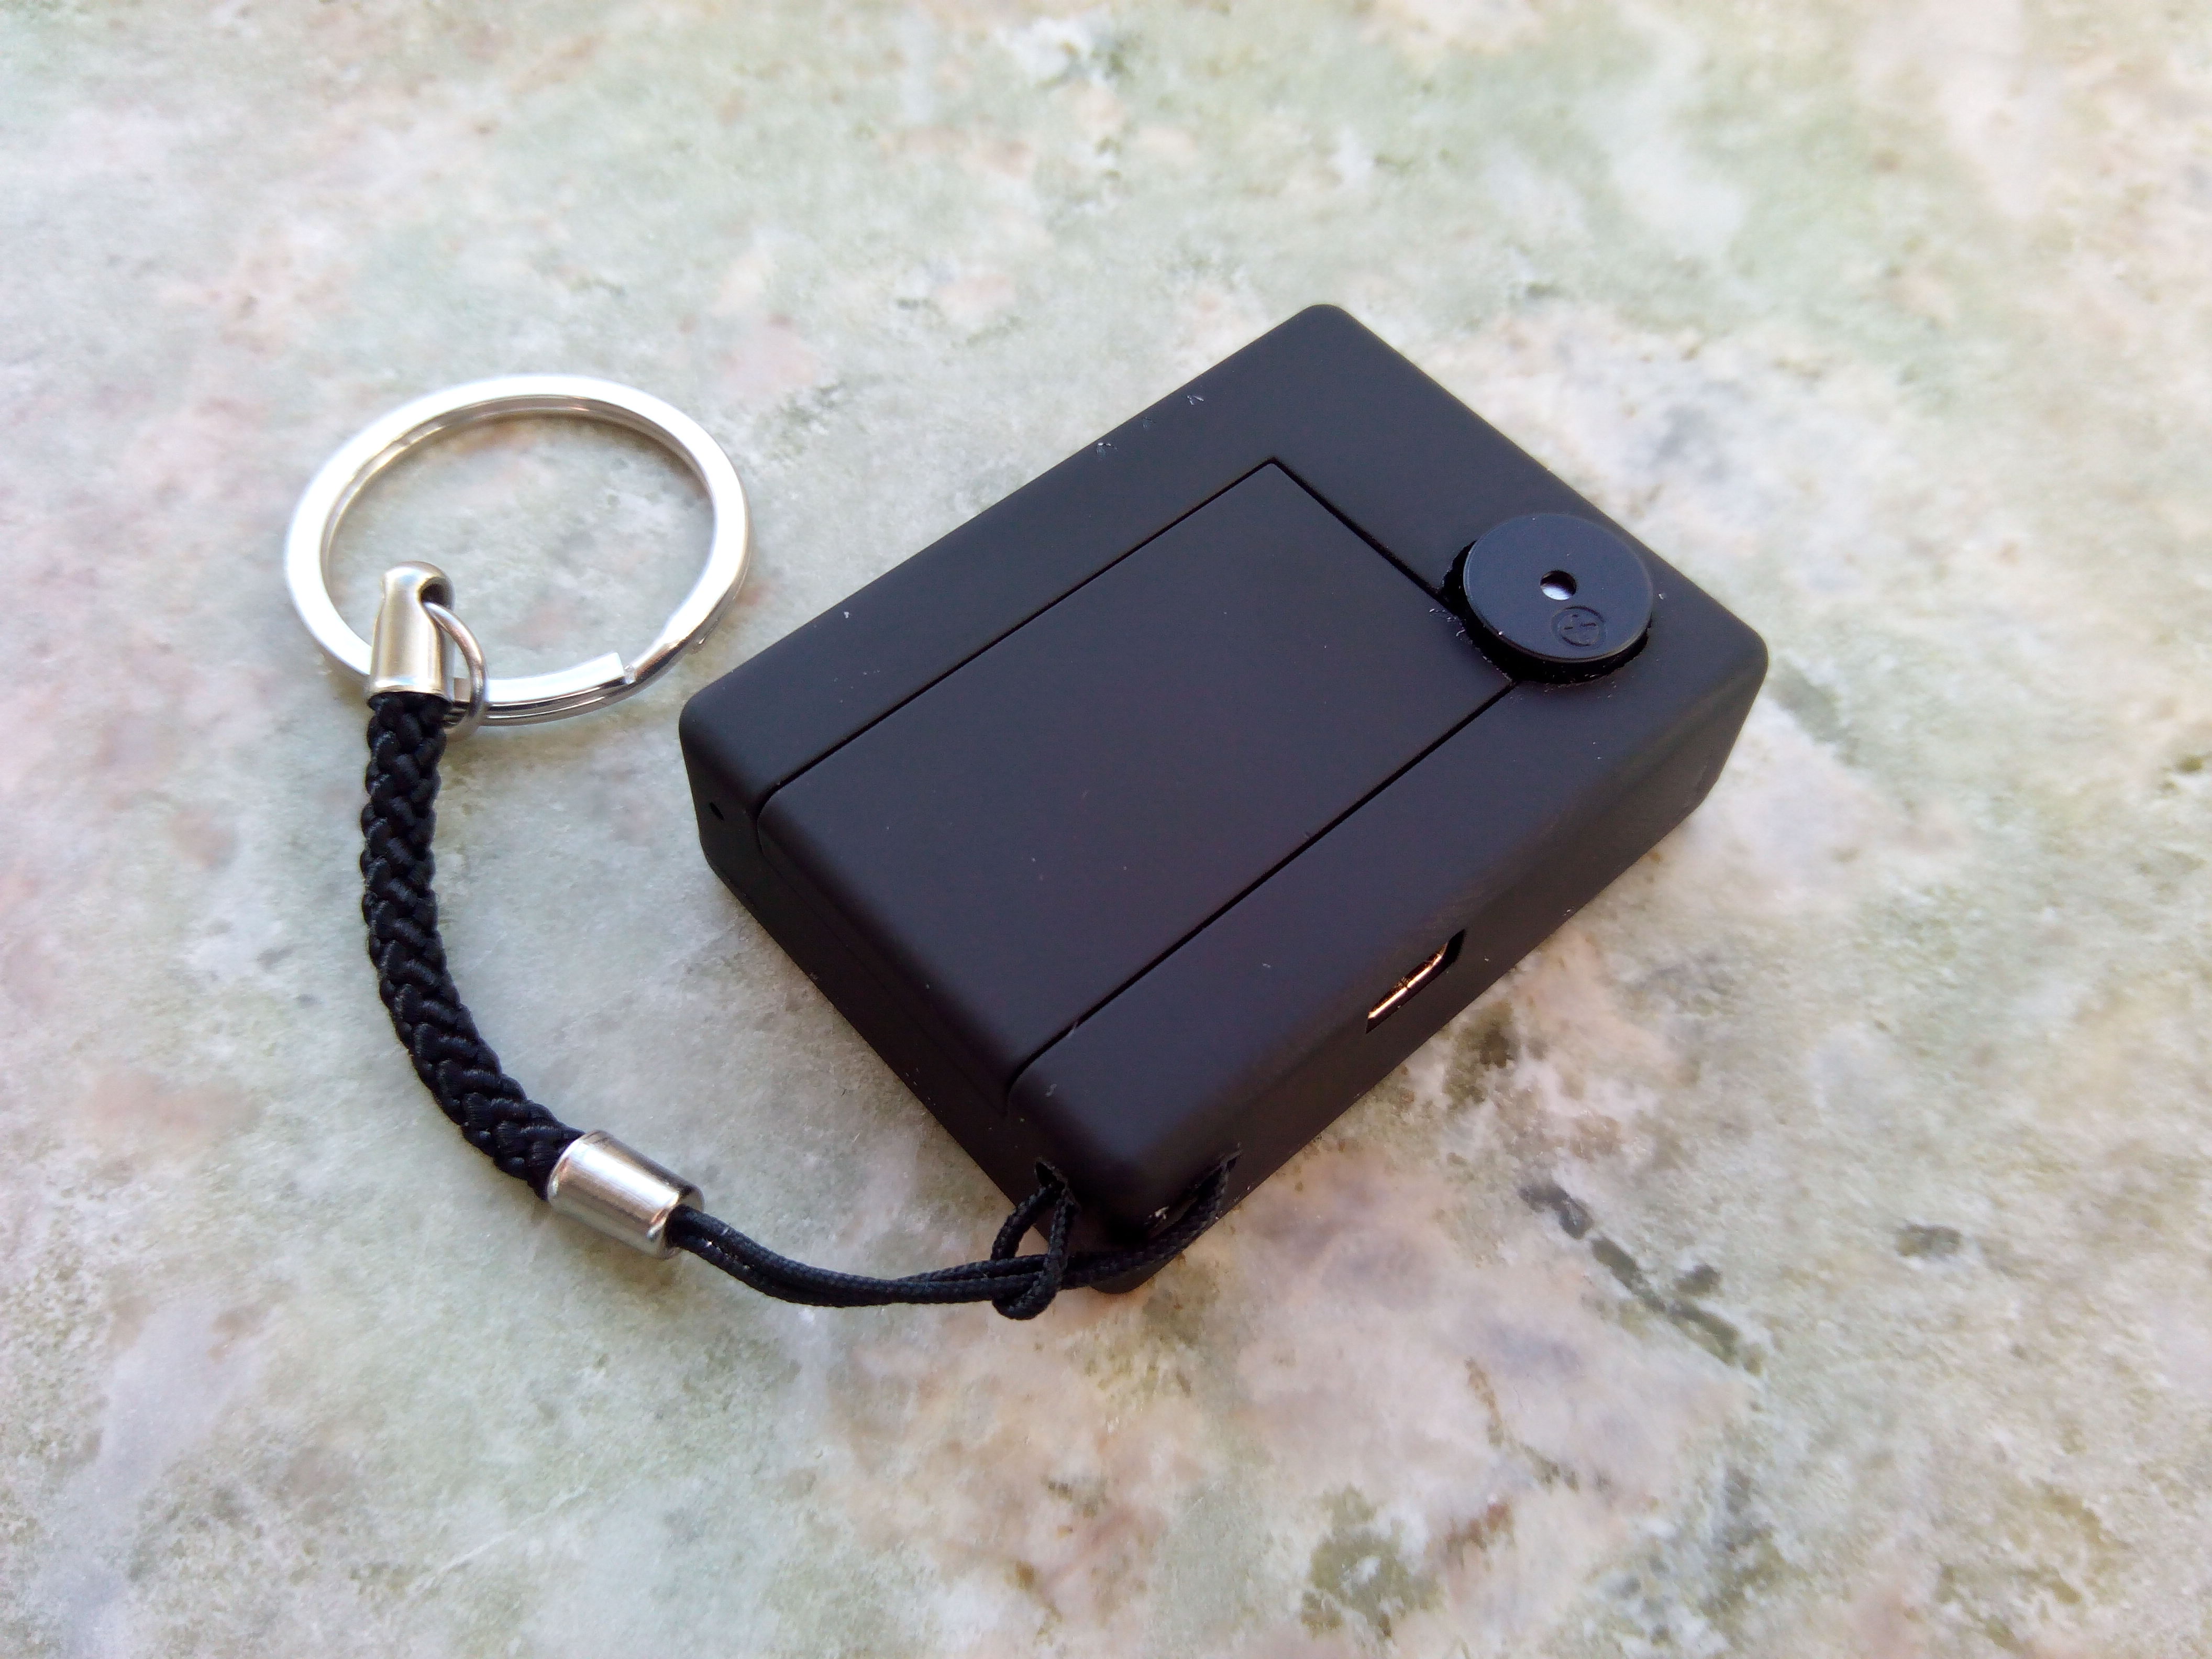
Step 8: Reassemble everything and check if it works properly. If it does, you will hear a very distinctive monotonic sound when you call it, which should help you locate it in the future.
Furthermore, you could make an extra hole and attach a LED light or tape your phone number on it, so in case someone hears and finds it, they can contact you.
To conclude, this device has some advantages over the commercial ones, namely it’s much cheaper, it does not require you to own a modern smartphone to use it and you don’t have to stand in the near vicinity to be in range. Unfortunately, it’s somewhat larger than most Bluetooth based devices, its autonomy is about two or three days only and if there are loud surroundings, you simply might not be able to hear it. Nonetheless, it’s a fun project to spend a couple of hours on and can make a great Christmas gift.
