IoTink: Your portable e-paper dashboard
18 February 2019

In our previous apartment, the gadget I was using daily was the VästtraPi which is a Raspberry Pi device with a 7” LCD screen connected to the internet indicating the next public transport departures. Since we moved, the new layout did not make it easy to have the screen mounted and continuously powered. Since the need to know when buses and trams leave remained, so it was time to use the E-paper display I bought last summer, to create… IoTink! (IoT + E-Ink 😂)
The solution was rather simple: Get an ESP8266 microcontroller to fetch the necessary information over the internet, display them nicely on the screen. Additionally, it had to be powered up by batteries and must not deplete them after a few days. The problem is that never I had ever utilized a standalone ESP8266 in a low power setting or an E-paper display. But well… even if it’d all fail, what better way to learn, than learn from your mistakes? 😁
Making API calls to web services not designed transact with embedded devices can quickly become difficult due to the volume of the data needing to be processed. Specifically, it might be a piece of cake to parse a JSON response with Python on a computer, but that is not the case when you have just a couple KB’s or often just bytes of memory at your disposal. Additionally, the faster we are done with presenting the data on the display the more power we preserve.
A web service was implemented to encapsulate the entire business logic. The microcontroller should merely fetch exactly what it needs over the Internet and just present it. I decided to extend an older project of mine, which was informing me about the public transport departures using custom Google Assistant Actions. At this point, I realized I often look at the temperature in the mornings on my phone to know what shoes to wear and whether I should take my gloves with me. So why not put some weather predictions to the mix?
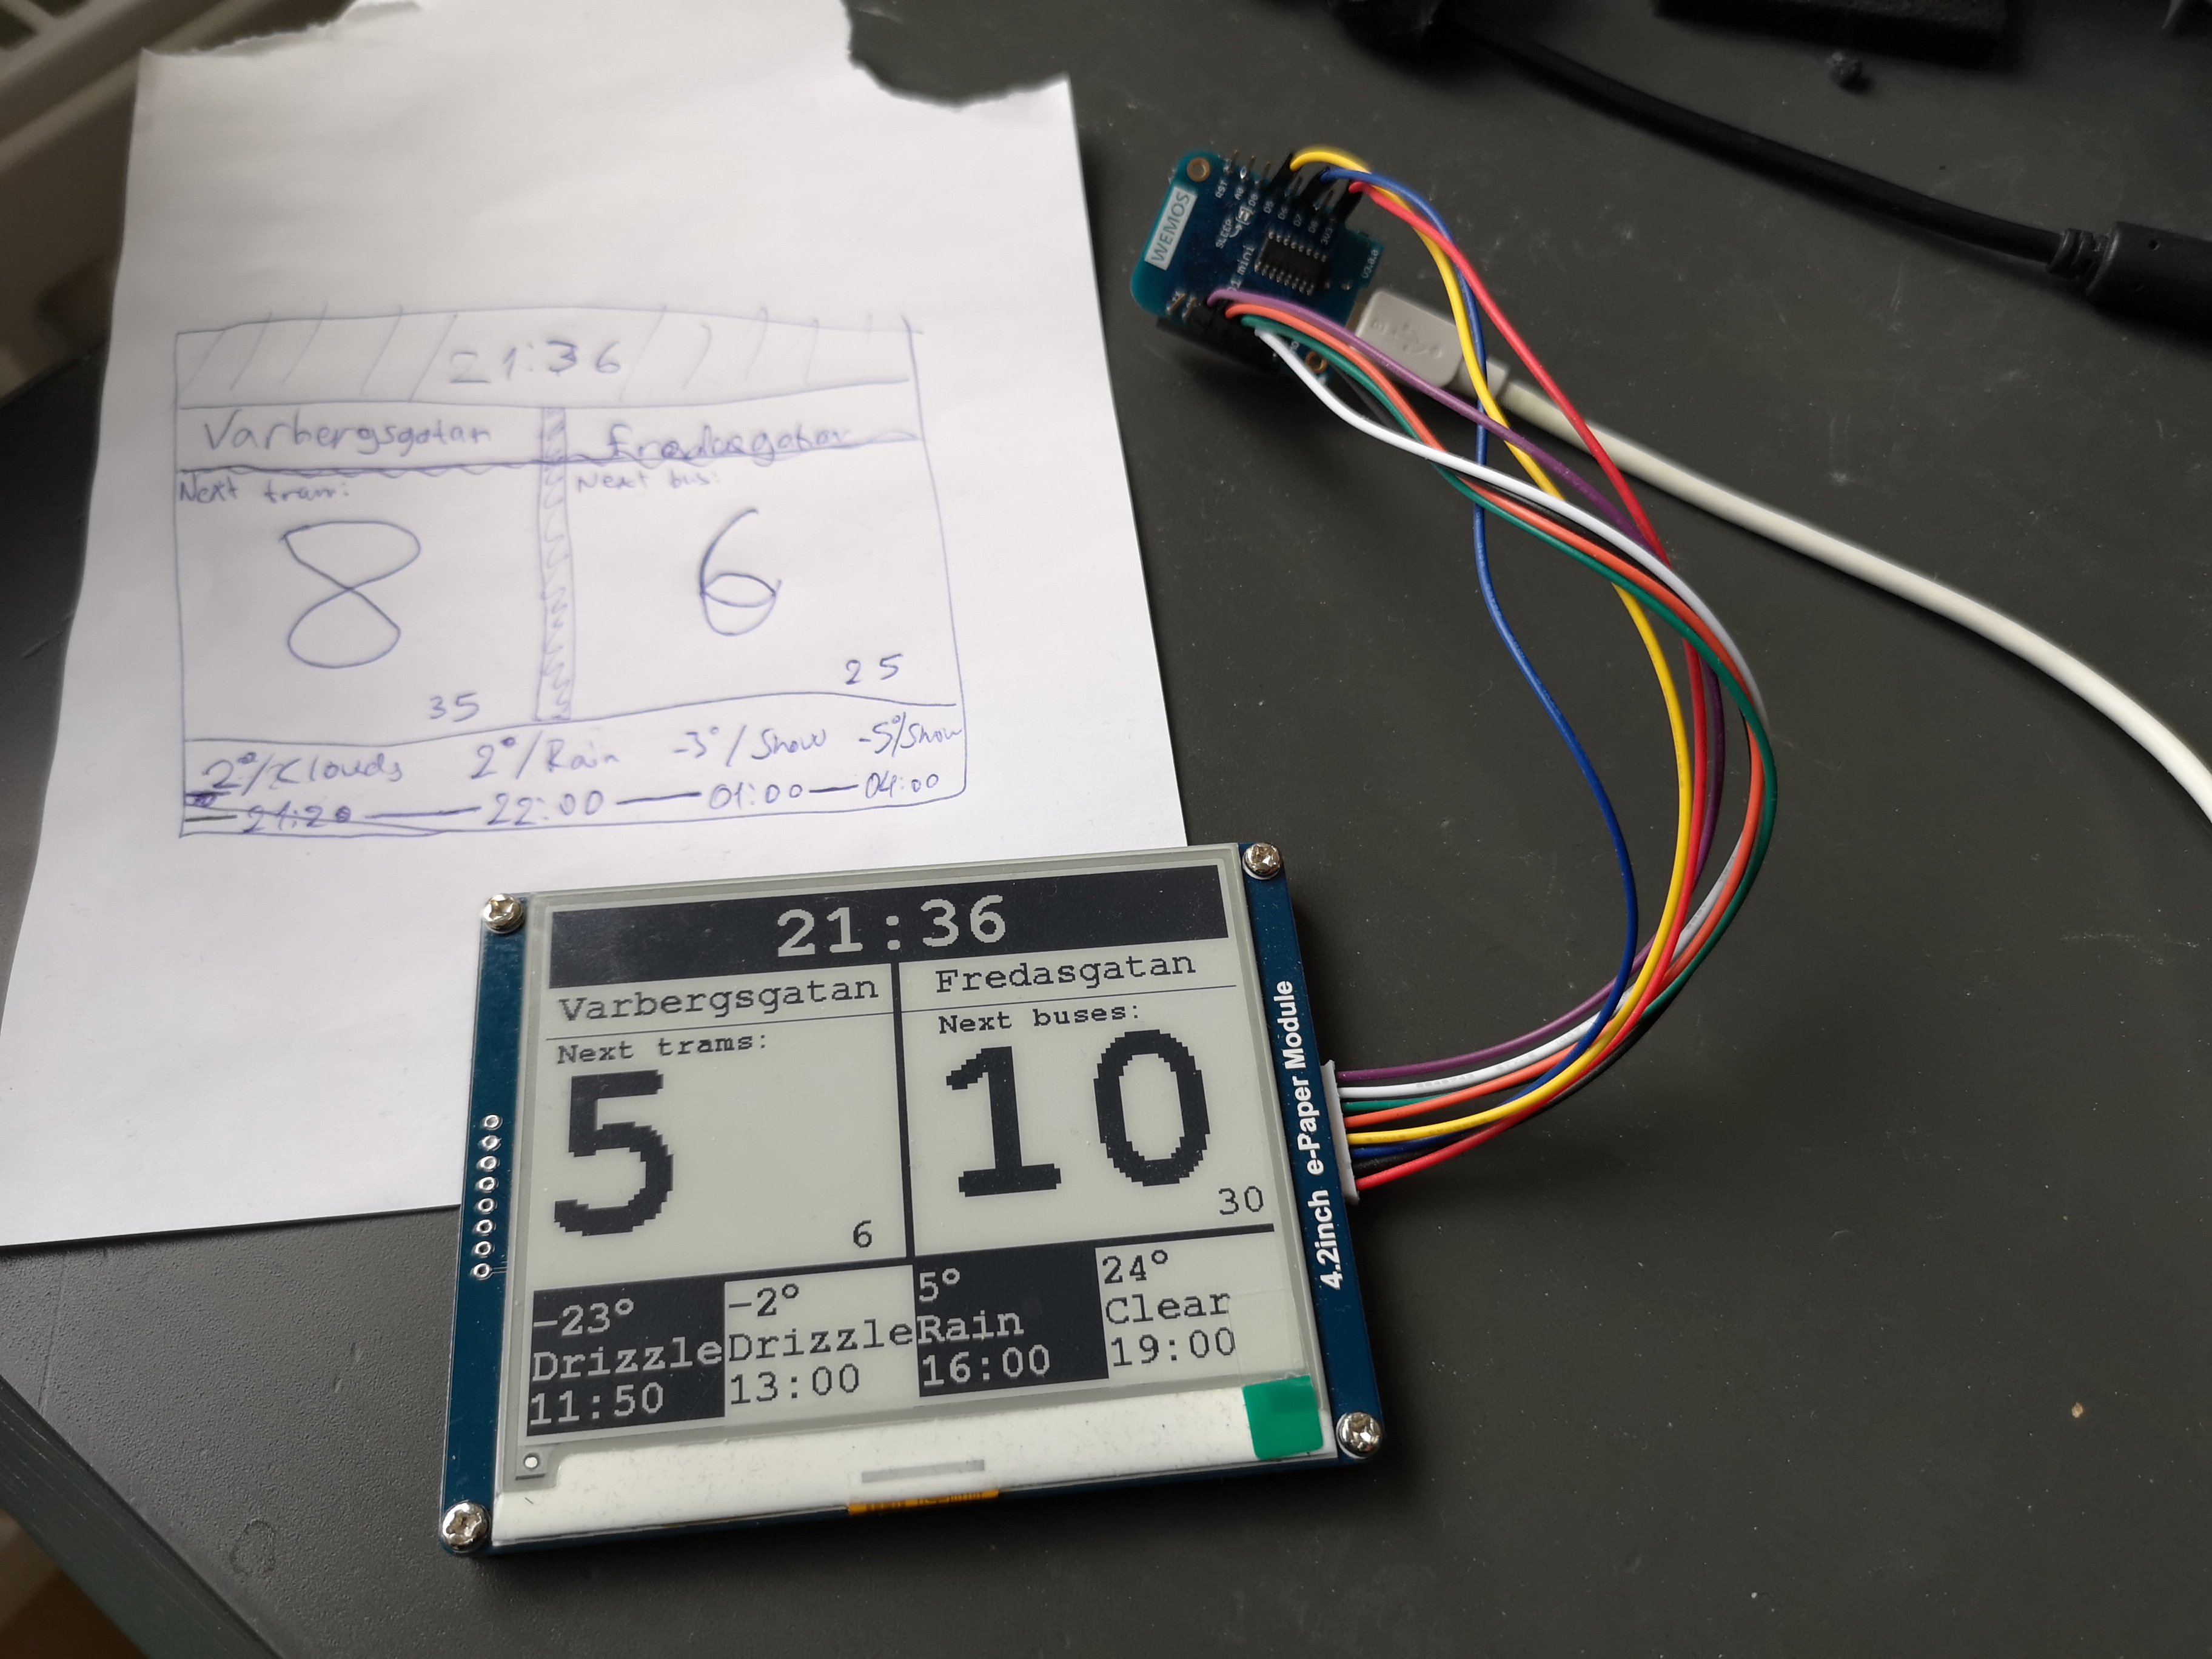
Next, it was sketching time. I am a very bad at designing graphics, but… I can manage grid-like layouts and grayscale colors. To control the E-Paper display I used the GxEPD library by ZinggJM, so the remaining task on the software side of things was to fetch the data, make sure they don’t look too bad to a non-developer and finally put the microcontroller into deep sleep for a minute. Then repeat everything all over.
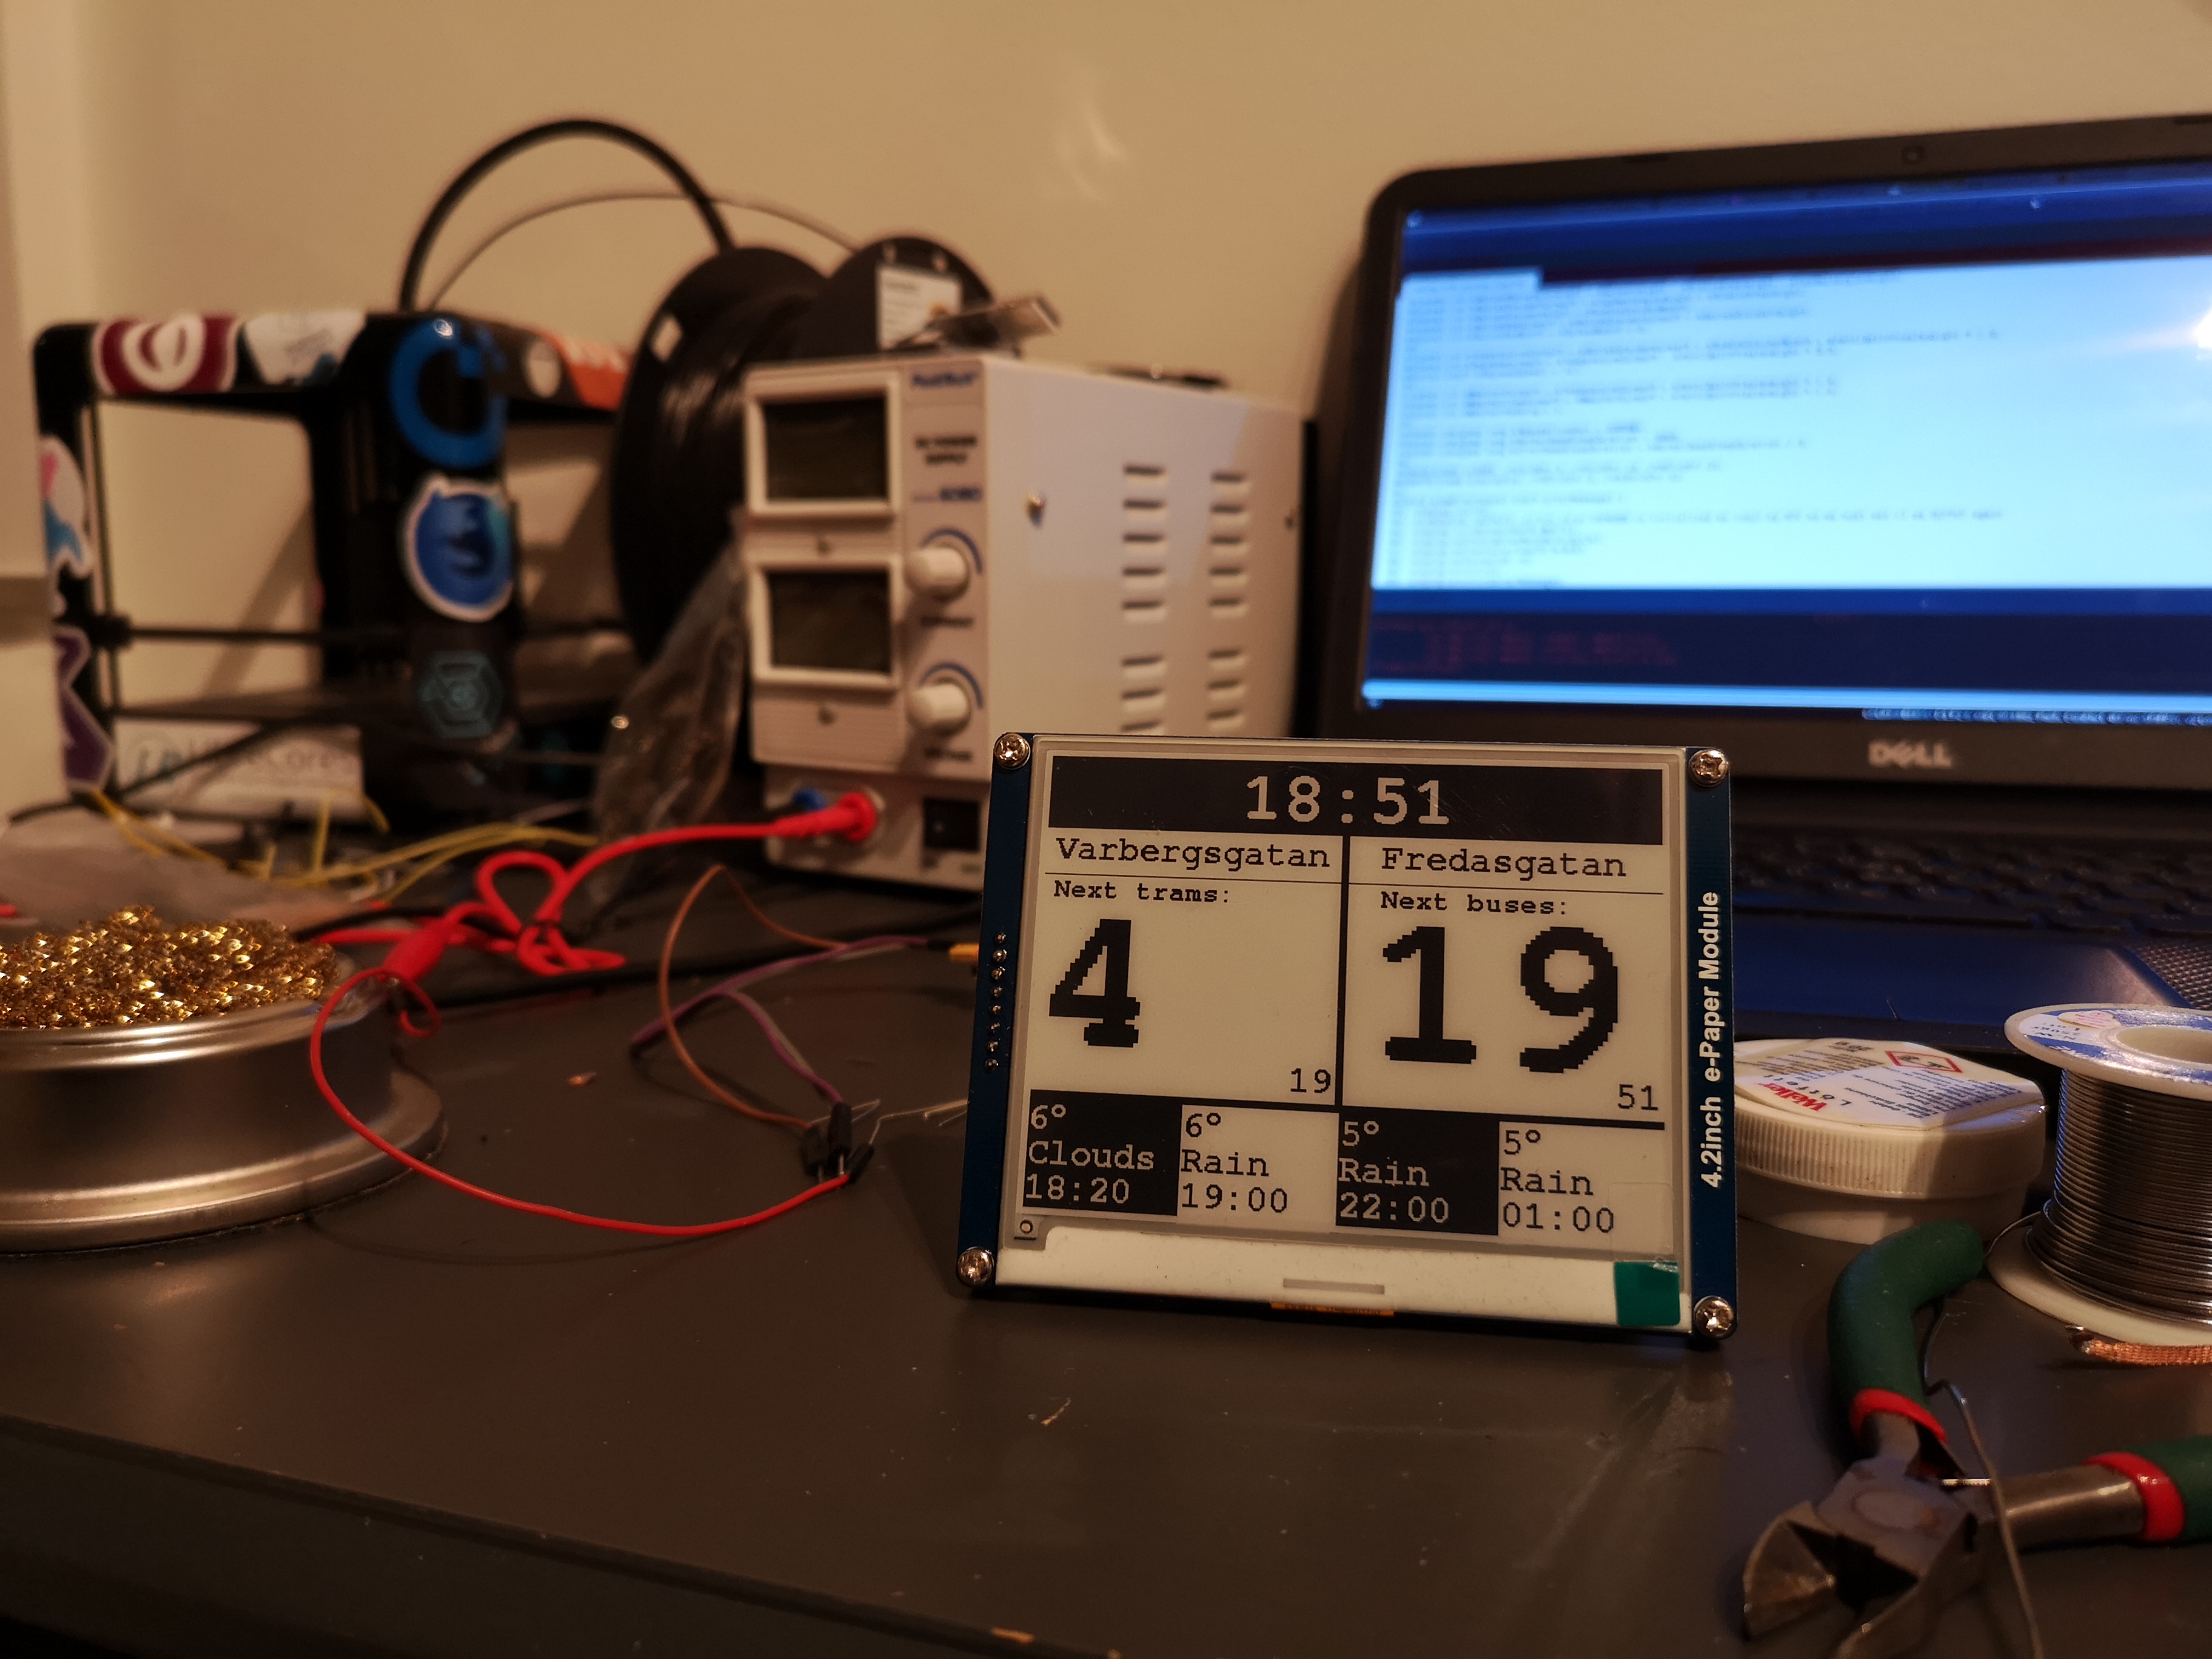
After prototyping the entire stack with a Wemos D1 Mini it was time to create the final boards. To power things up I wanted to keep things simple. Since I had a lot of space available behind the 4.2” E-paper display, I opted for 2+2 AA batteries. Each pair is connected in parallel, while the two pairs connected in series to each other supplying around 3 Volts which appears to be just enough for the ESP8266. By the way, I have promised myself that for the next design I will include a low dropout regulator to avoid power-related surprises. Moreover, it should be noted that a very valuable resource on how to design a basic ESP8266 board can be found here. The ESP12F module was selected due to its large availability, low price and solderability by hand.
The IoTink boards were ordered from PCBWay on a Monday morning and they arrived (as usual) on Friday. What makes this feat even more impressive this time is that Monday was the first day after the Spring Festival. This means they were able to maintain their throughput despite having to deal with two weeks worth of orders! 💪
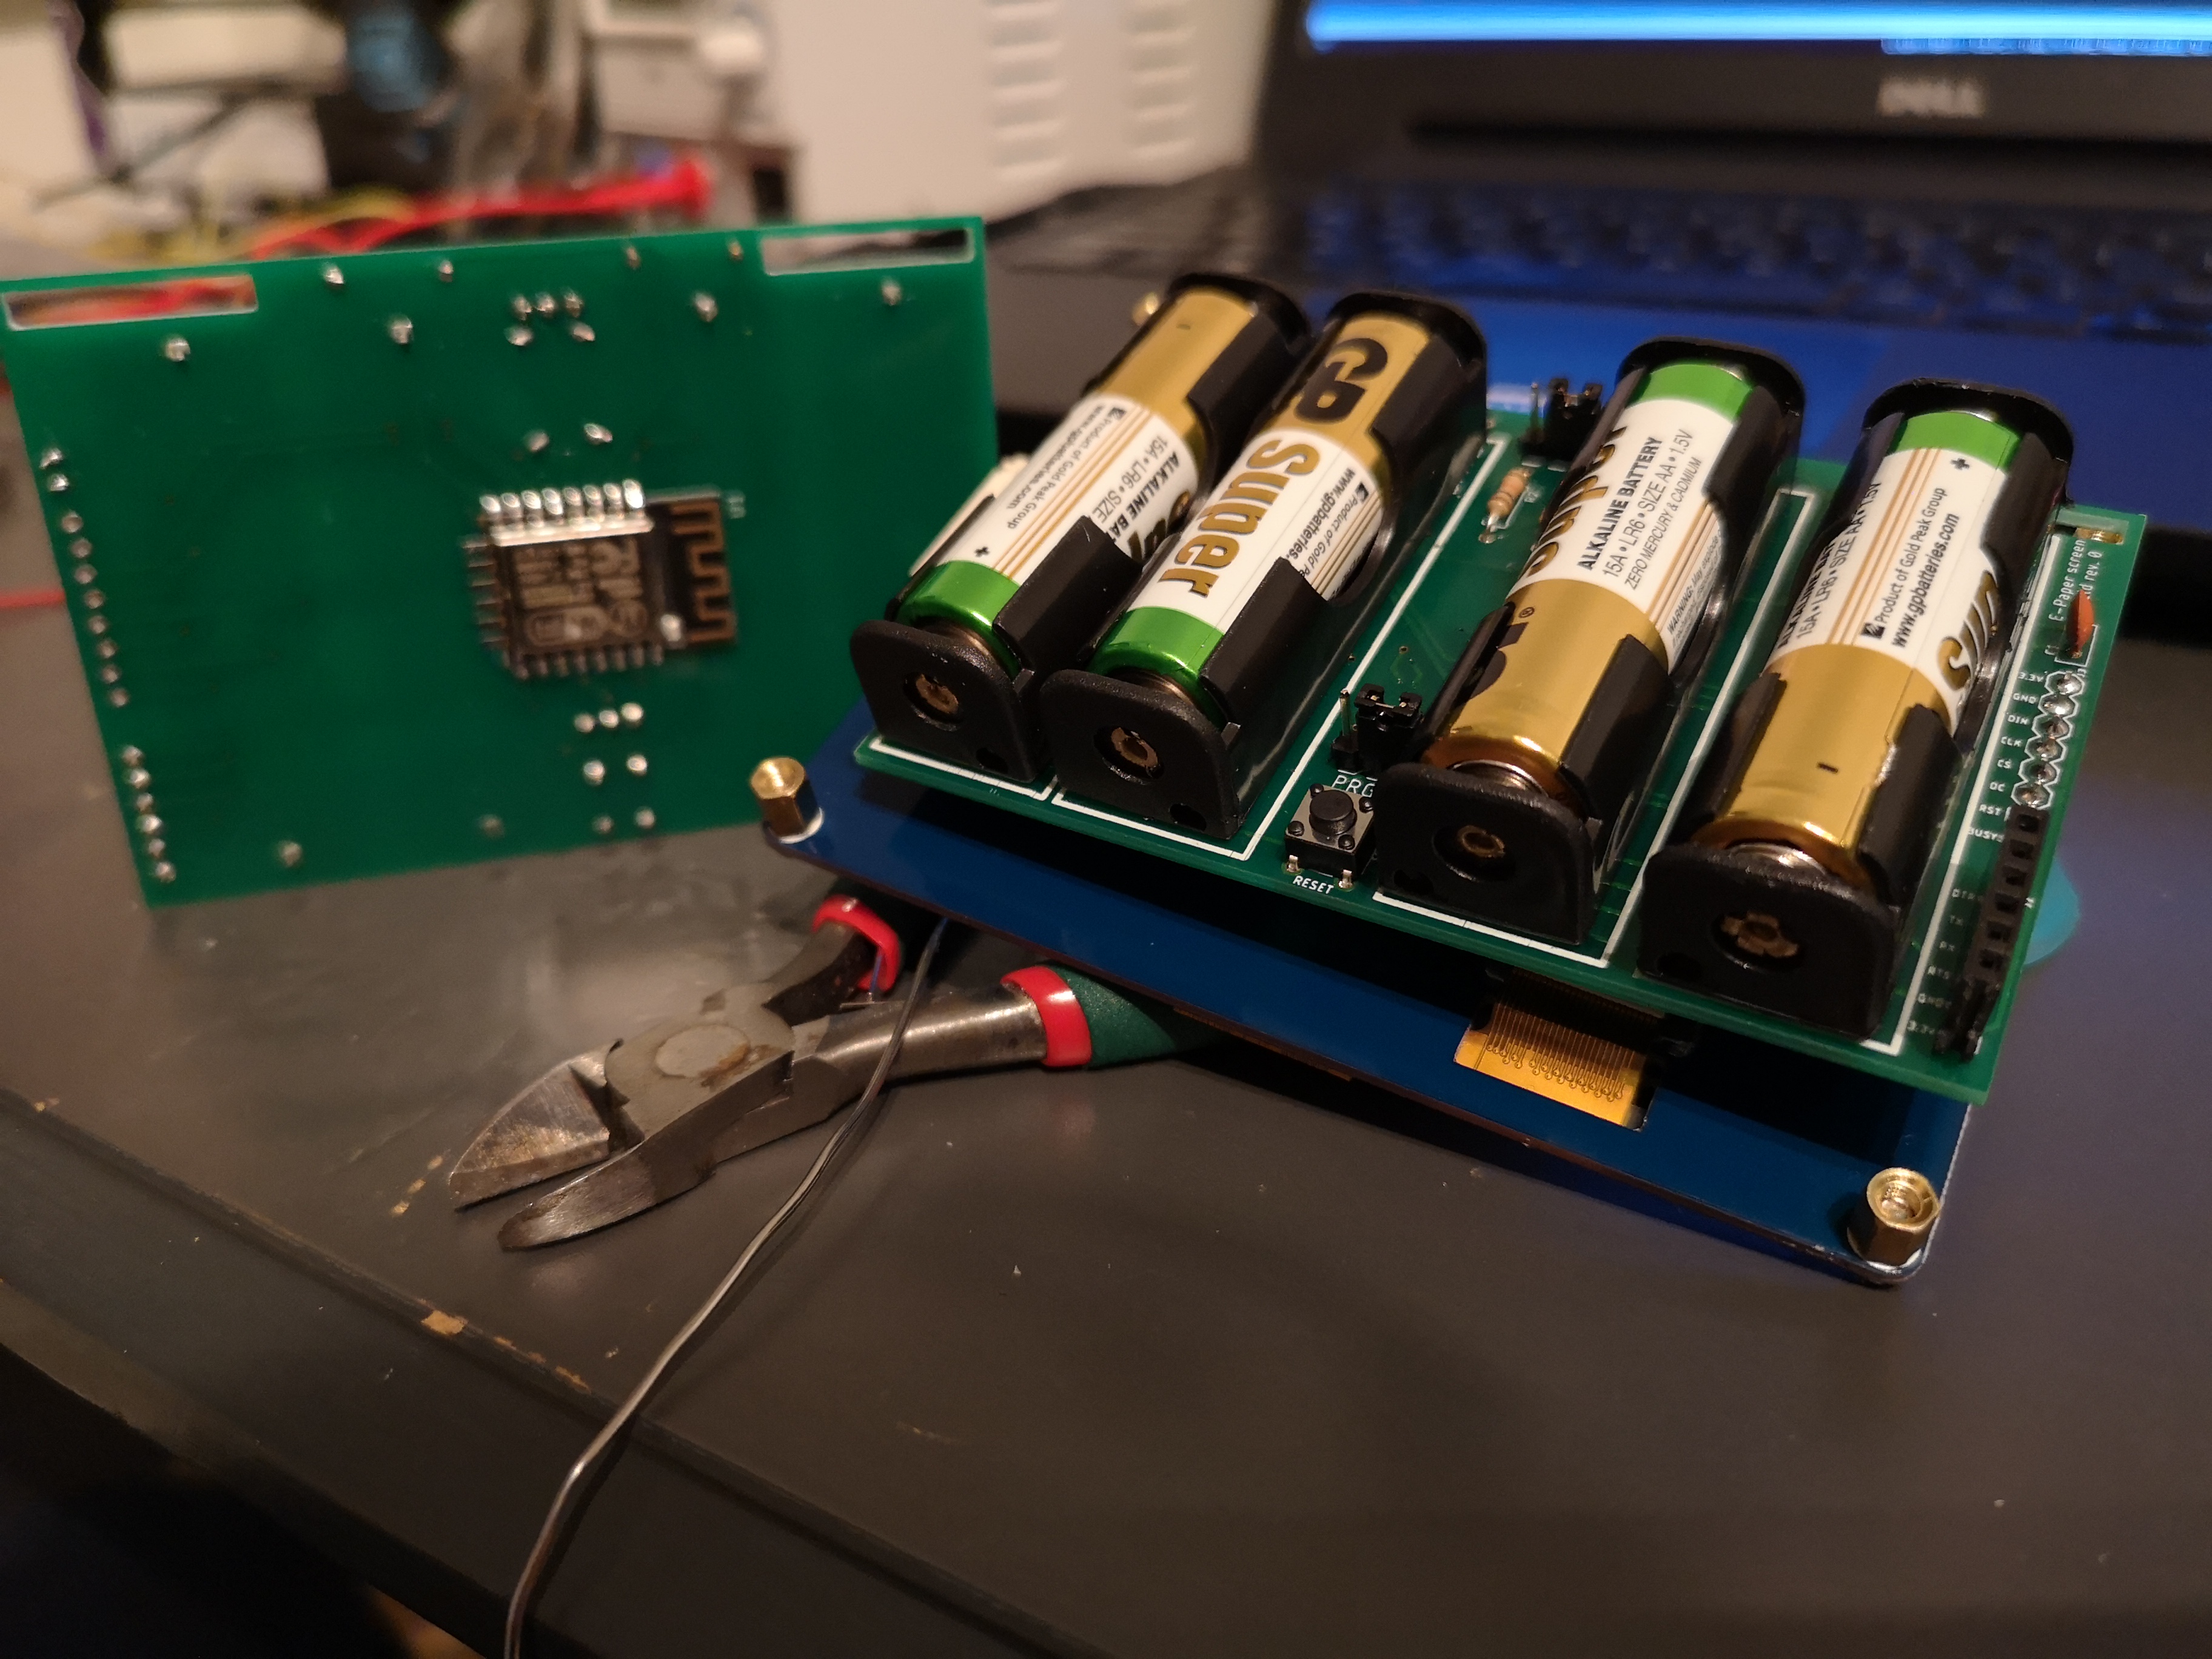
The board should be attached behind a Waveshare 4.2” E-Paper display and has some openings on the top to be easily mountable on a wall. I chose not to solder the board on the screen since the latter is a bit expensive (30$), takes long to be delivered from China and I might be revising the PCB in the future. In any case, the pins seem to hold things together good enough for the time being. During assembly, somehow, I managed to fail soldering the first ESP12F. It was booting up, getting programmed and running seemingly fine but was unable to use any of its WiFi capabilities, but the second one did the trick. If you share my poor soldering skills, pay extra attention to it.
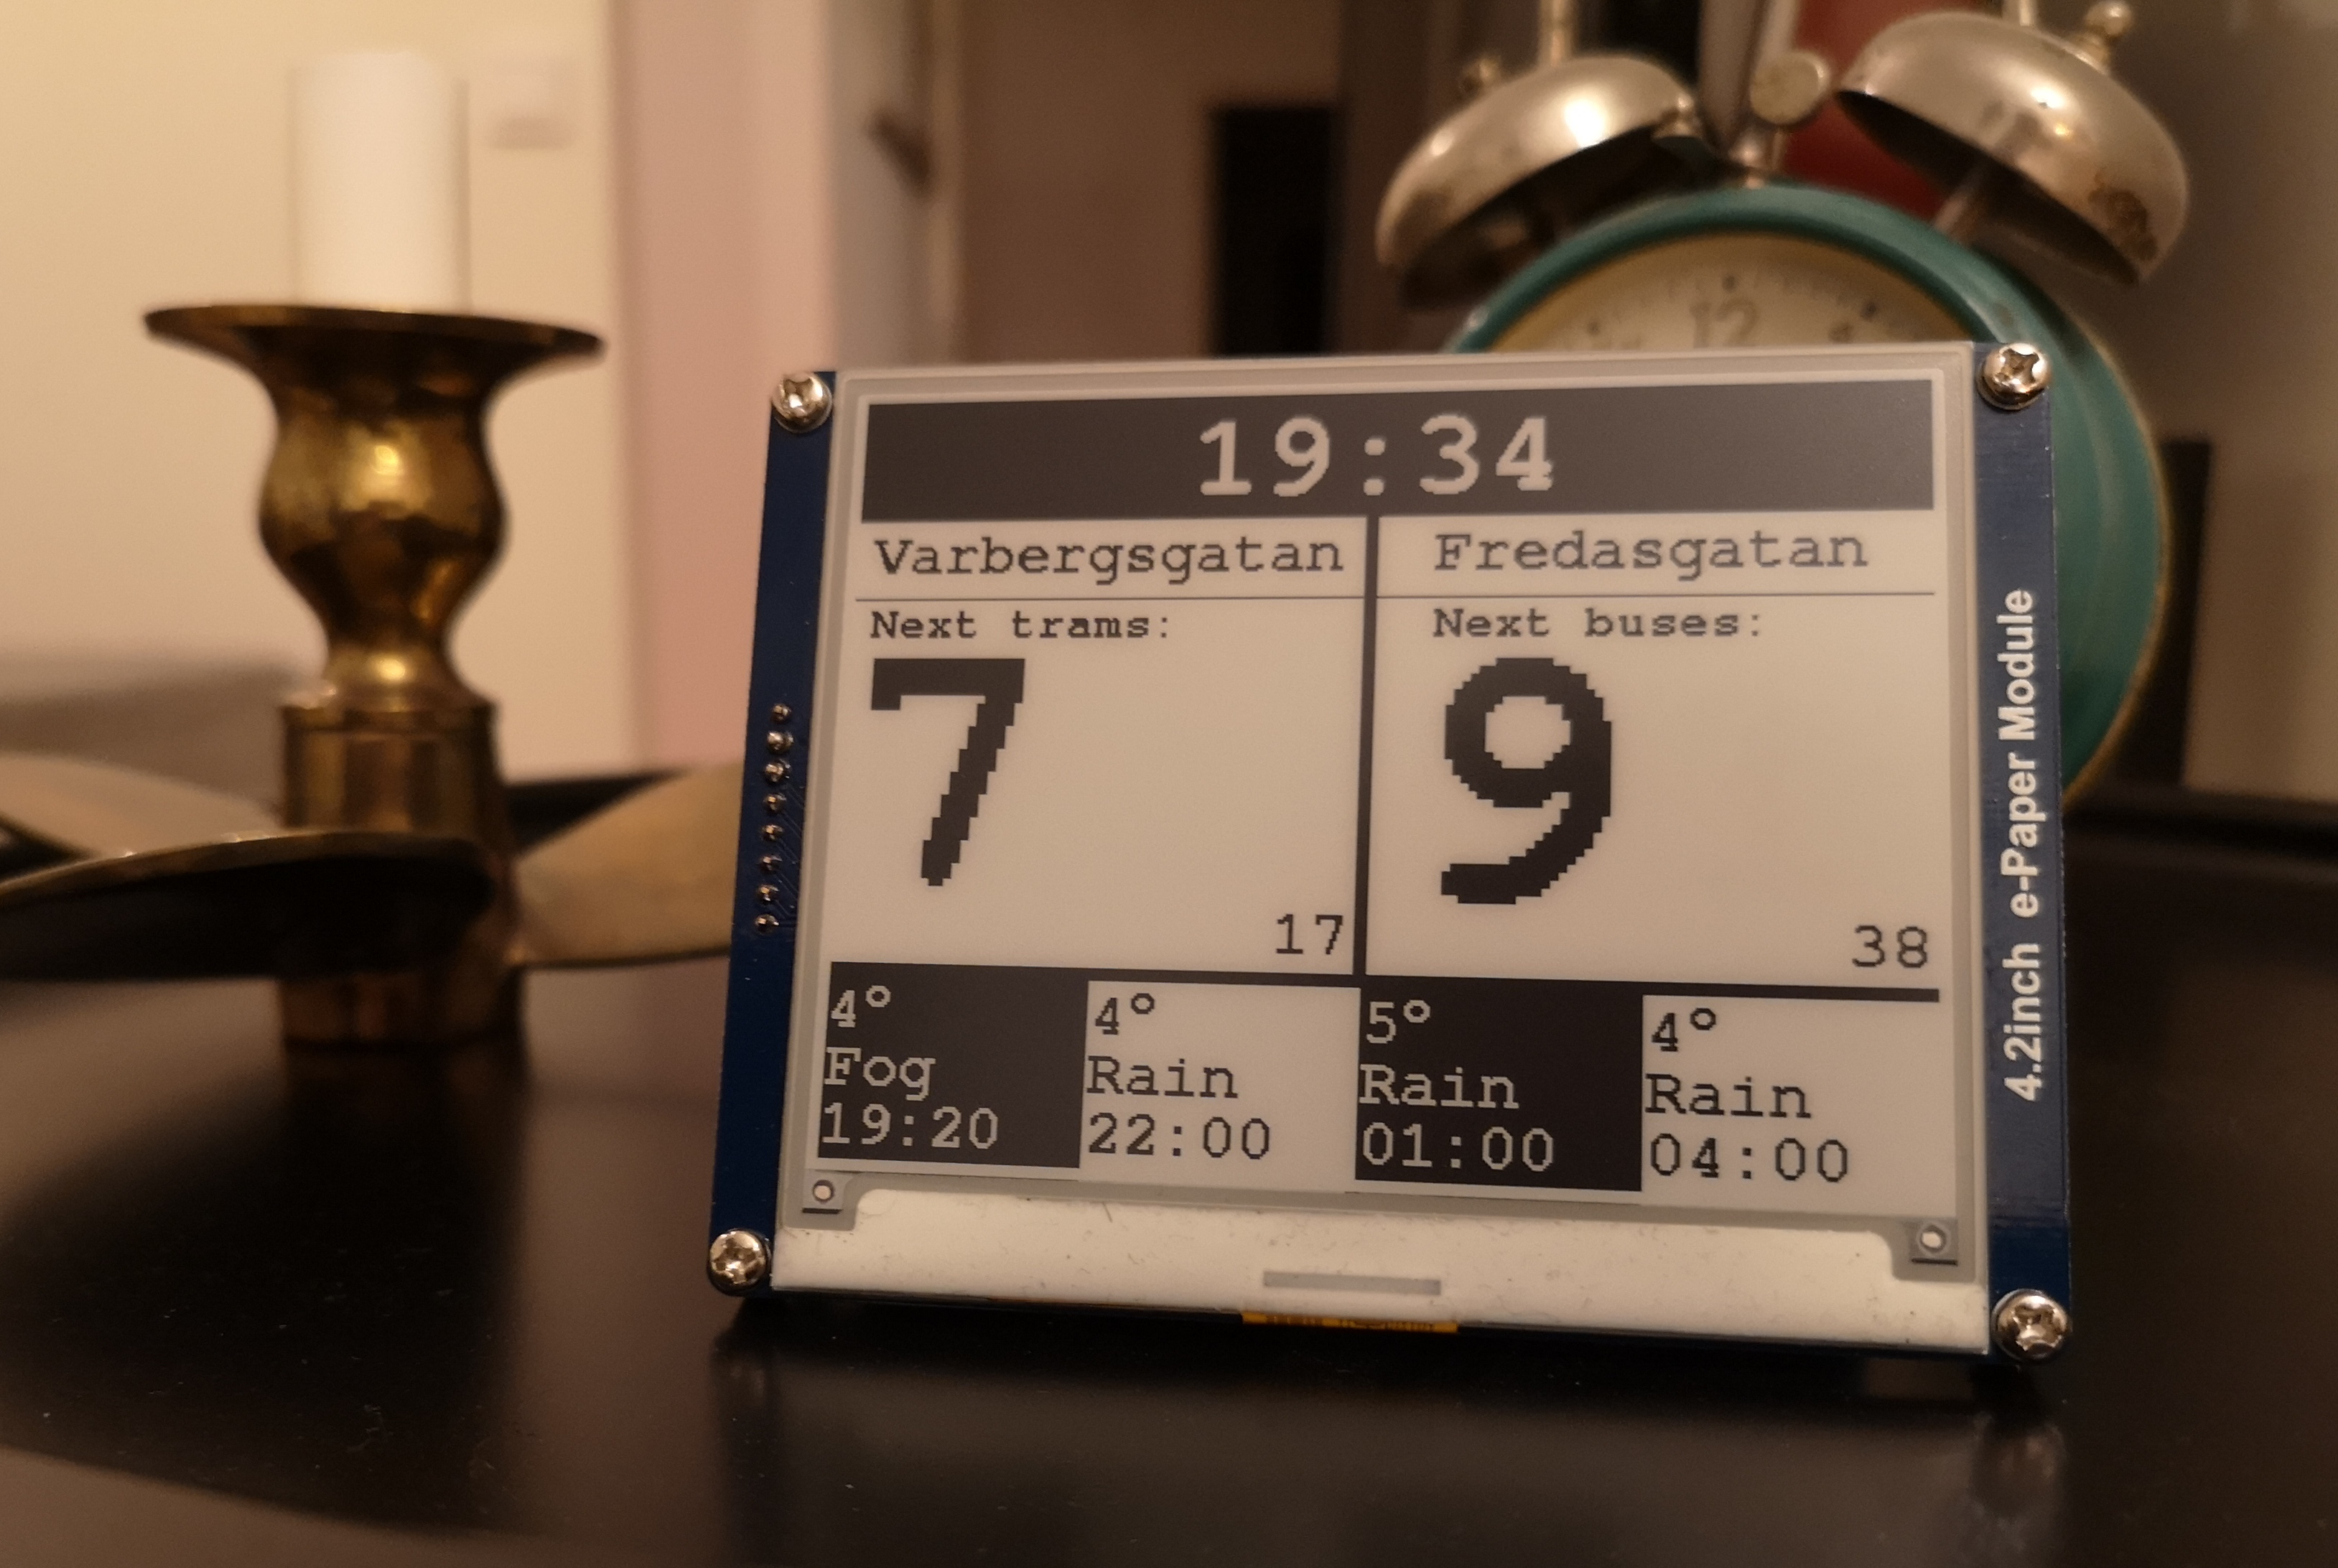
I haven’t gotten the chance to mount IoTink on a wall yet, because my girlfriend strongly objected citing aesthetic concerns (I really don’t understand why) so we finally compromised in placing it on a table near the apartment’s entrance. Thankfully, it is just as useful there since we pass by that spot before entering the hallway.
IoTink’s software and hardware source can be found on GitHub. The software is naturally coupled with my specific use case, however the hardware as well as the entire concept can be utilized to build low-power, portable dashboards connected to the internet, without having to invest in cabling infrastructure. As long as they do not have to be updated in real time or too often, then this WiFi + E-Paper combo sounds to me like an ideal solution. Finally, check out a demo video I made about IoTink below:
