A multipurpose business card
08 July 2015

First impressions matter, but what about… the second ones? Say you have met a potential employer or business partner, awed them with your skills, personality, knowledge (or your interactive name tag) and it’s time to give them your contact information. You hand out a business card. So why not make that one stand out as well?
Sure, you can always have fancy designs printed on it or even a QR code, however, why not take it to the next level and instead of a card, give them a PCB?
I got my initial inspiration from Frank Zhao’s USB PCB Business Card and Mike Puchol’s PCB business card, however I wanted something simpler to build. My idea was to make a small development board out of the business card, with a microcontroller and its pins broken out, ICSP headers to program it and some available pins for prototyping. Its usability would of course not be anywhere near that of an Arduino, however it could potentially be used to make something cool.
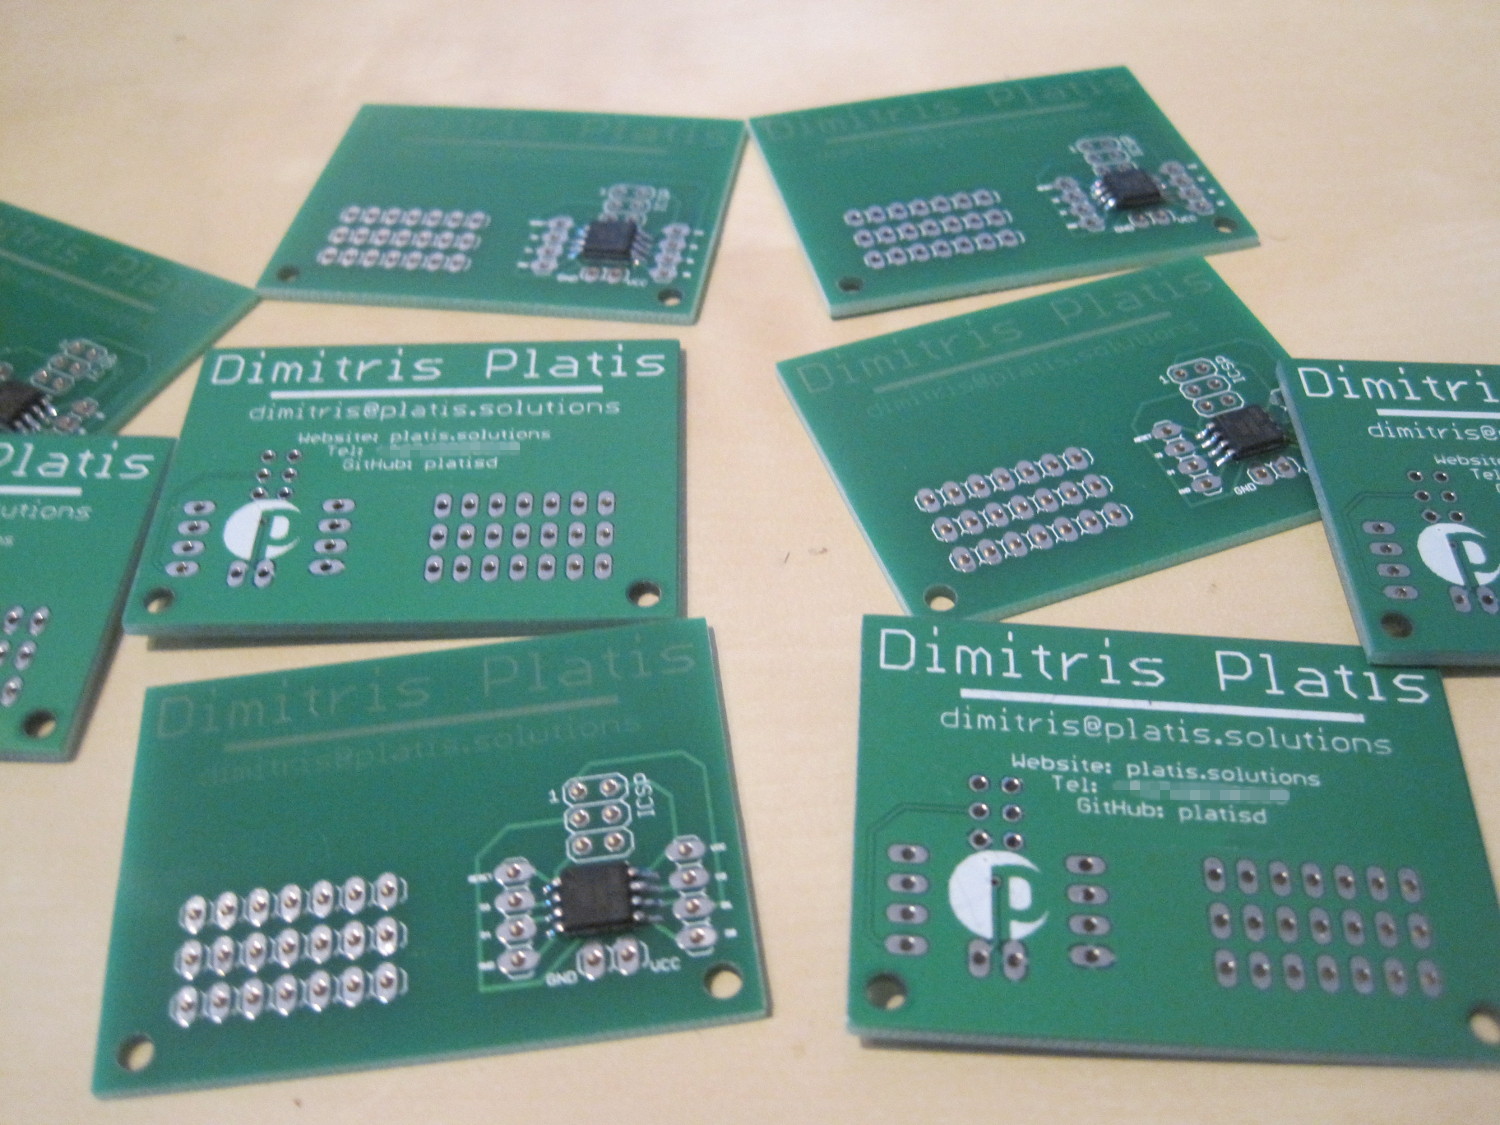
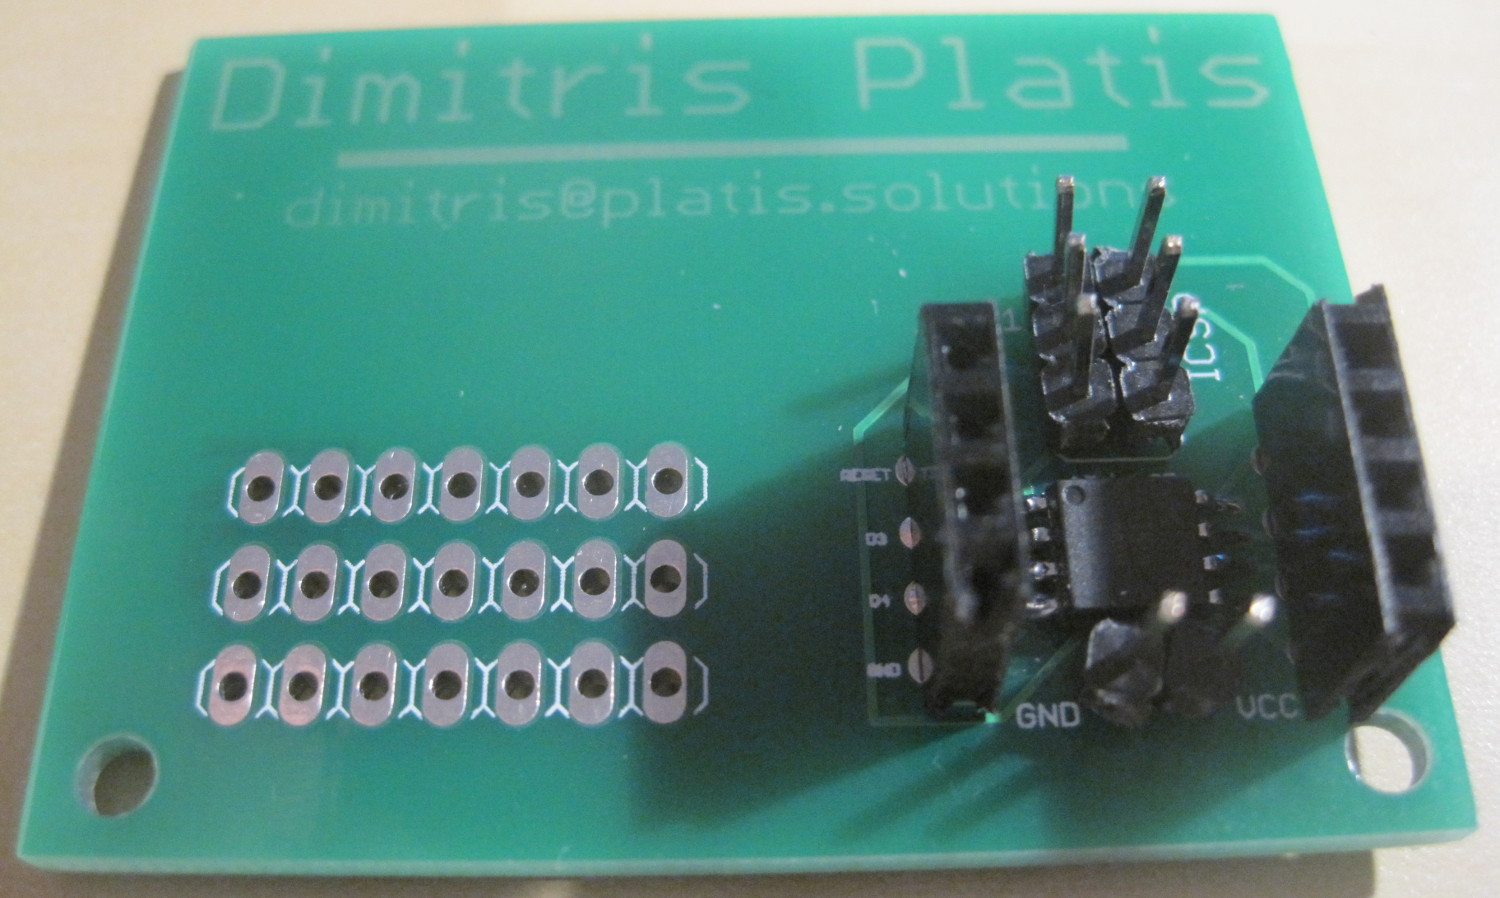
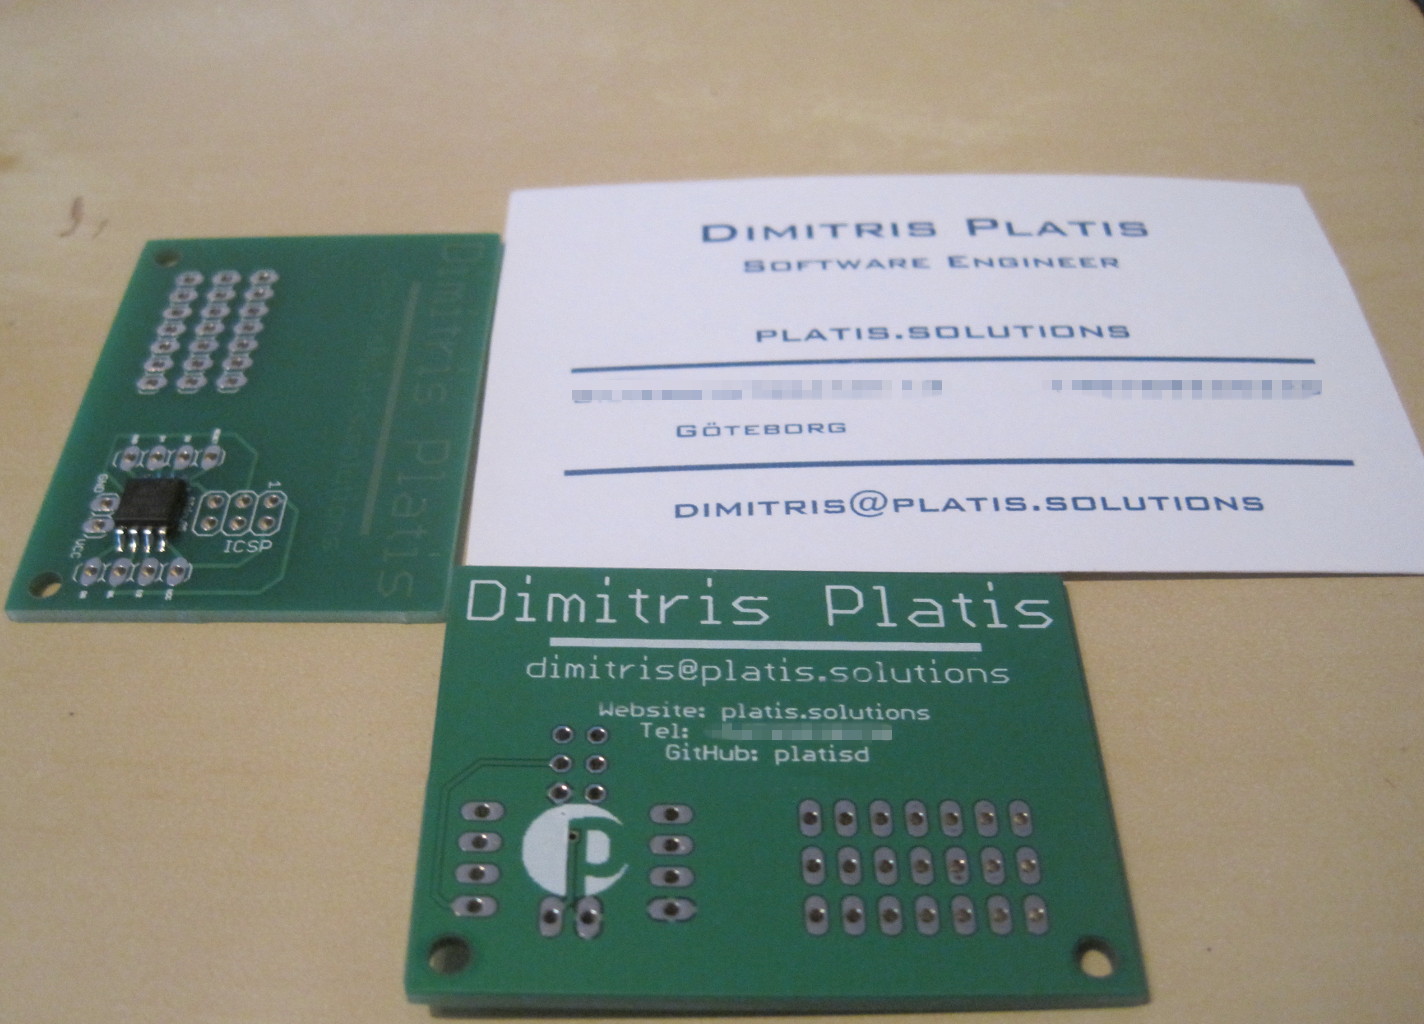
I also (accidentally) purchased ten ATtiny85-20SU’s a few months back, which is the ATtiny85 in SMD package. It was time to put them in use. The result was a dual purpose board, a business card with my contact information and a ATtiny85 breakout board that can be used to make all kinds of things such as a radio kill switch or a line following track. I ordered 10 boards, through Fusion PCB service, by Seeed Studio mainly due to the fact that I wanted many of them, at a low price. The boards arrived from China about a month later and are of a pretty decent quality. The only problem is that they print a reference number on the boards (edited out of the photos in this article), which as you can imagine is not the best aesthetic addition to a business card. I have published the Eagle schematic and board files on Github, under a CC0 license, which means that they are into the public domain and you can do whatever you want with them.
The how-to, to make this card, was featured in Instructables and has more than 30 thousand views!
How to design one
It is relatively easy to make a PCB business card. There are particularly three different approaches, from the “hardest” which offers the most freedom to the easiest, which limits you to the layout I created.
If you know how to use CAD programs like Eagle, then simply design one yourself from scratch. You will be able to suit it to your own needs and liking, while expressing your creativity to the maximum.
If you do not know how to use CAD programs like Eagle, but would not mind spending 30 minutes or so, learning the basics, then you can take my design found here, import it into Eagle and change it as you wish. Depending on how much time you wish to spend on this, you could create something fundamentally different in just a couple of hours, without any prior experience. How about using another microcontroller or adding a battery for example?
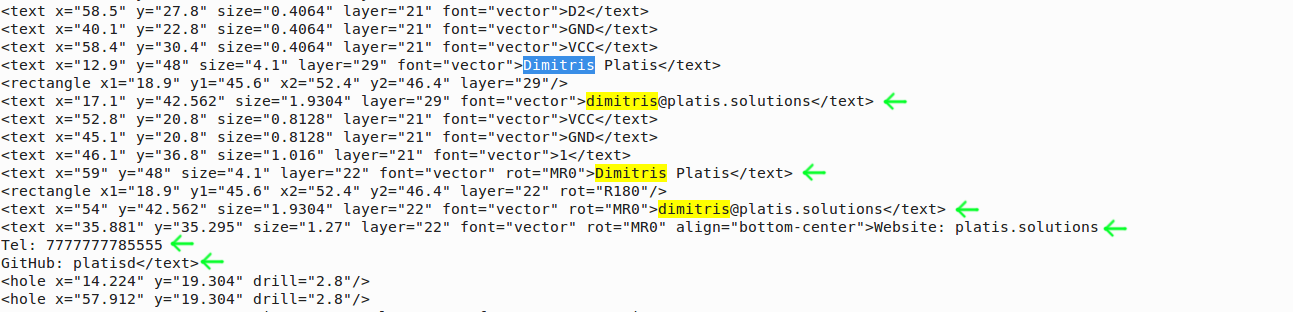
Finally, if you do not know and do not want to learn how to use such tools, then just save the pcb_business_card.brd file (right click + Save link as) and open it with your favorite text editor. Observe that it’s basically an XML file. Find where I have placed my name (ctrl+F then type “Dimitris”) and edit the appropriate fields with your information.
How to fabricate one
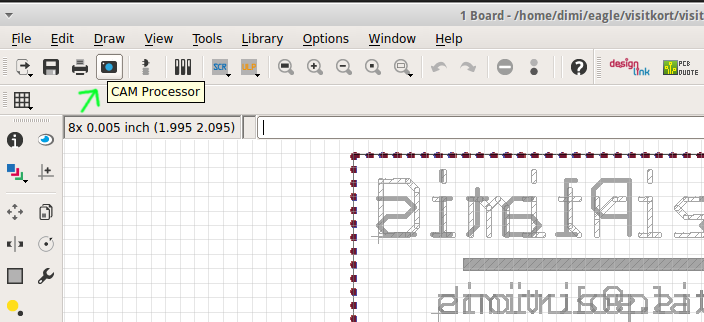
OK, now that you have designed the board, it’s time to fabricate it. You could do that entirely by yourself, but if you have never done that before, then it is best (time, effort and cost wise) to just use a service like OSH Park, or Seeed, to do that for you. OSH Park is the most hassle free, where you only need to upload the .brd file, check the preview of your board and if you like what you see, order it. If you have opted not using CAD at all, then this choice is just perfect for you, since you can make changes in the XML file, upload it to OSH Park and directly review the results. If you go for Seeed, where approximately the same money, will get you more boards, then you will first have to turn your Eagle files into Gerber files. Note, you will have to do that in Eagle, by downloading their CAM file and while being in the board or schematic view window, open the CAM Processor.
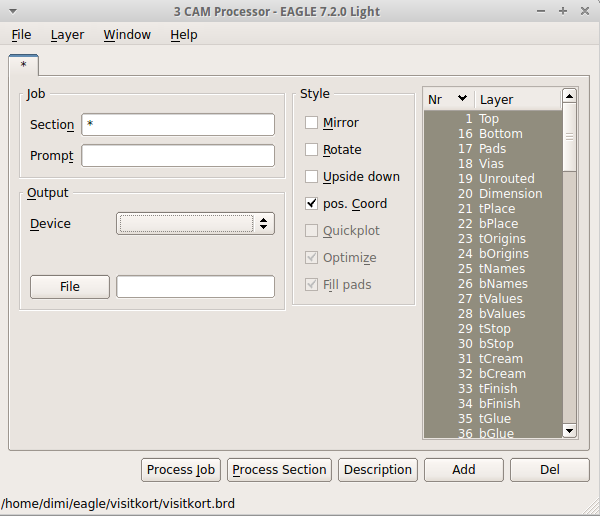
Then a window like this will pop up. Go to File > Open > Job and pick the .cam file you downloaded.
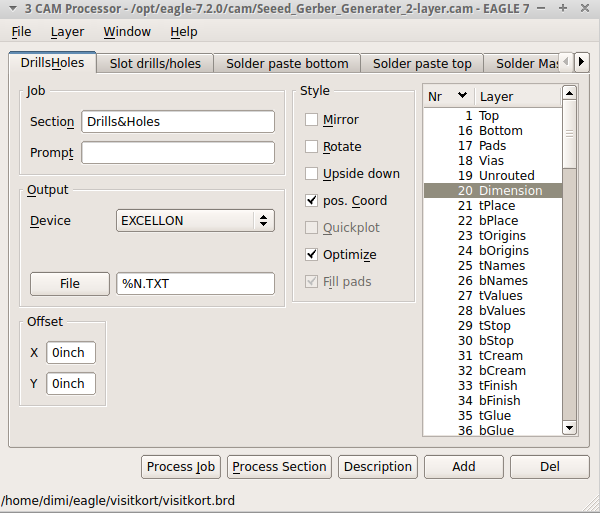
If done successfully, upon return, the window will look something like this. Notice that there are more tabs now. Click on Process job. That was it.
Go to your Eagle project’s location, on your hard drive and you will see that a bunch of new files have been created. Zip them and upload them to the service of your choice! That was it. In Seeed Studio, you can also see the preview of your board, before ordering it.

If no changes are made, your cards should look slightly better than mine. I improved the design, by exposing the copper on the front side of the board, so your name will look more metallic and shiny. Another change I made was to add VCC and Ground pins to the prototyping area on the left. Last but not least, I removed my logo, so you won’t have to do this yourselves.
To conclude, this is an easy project which can make you stand out from the crowd, with little effort and money. You can even hand them out without the microcontroller if you want to lower the cost and the size. It should not decrease the wow factor. Finally, this is how the card looks after soldering some pins on it. Cute, isn’t it?